If you’re looking for a simple and fast crochet project, consider making a modern granny square pillow! This pillow has a fun twist on the classic design. You can view the pattern for free on this page or buy the ad-free, printable PDF from our shop.
UPDATED: JUNE 7, 2023 BY BRITTANY
This post may contain affiliate links. See our Disclosure Policy for more information.

Skill Level | Easy
Finished Size | Fits 16″ x 16″ Pillow Forms
I love crocheting granny squares, especially when it’s warm outside because they’re small and easy to carry around with me. I can put a few squares in my bag and crochet wherever I go.
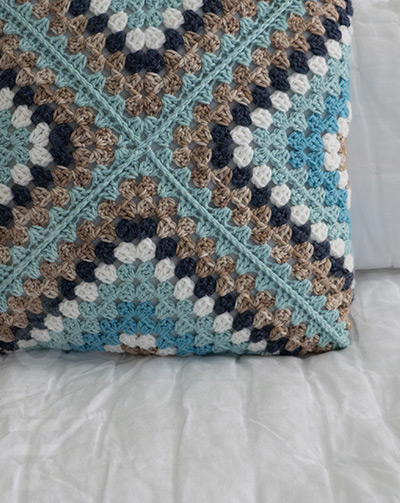
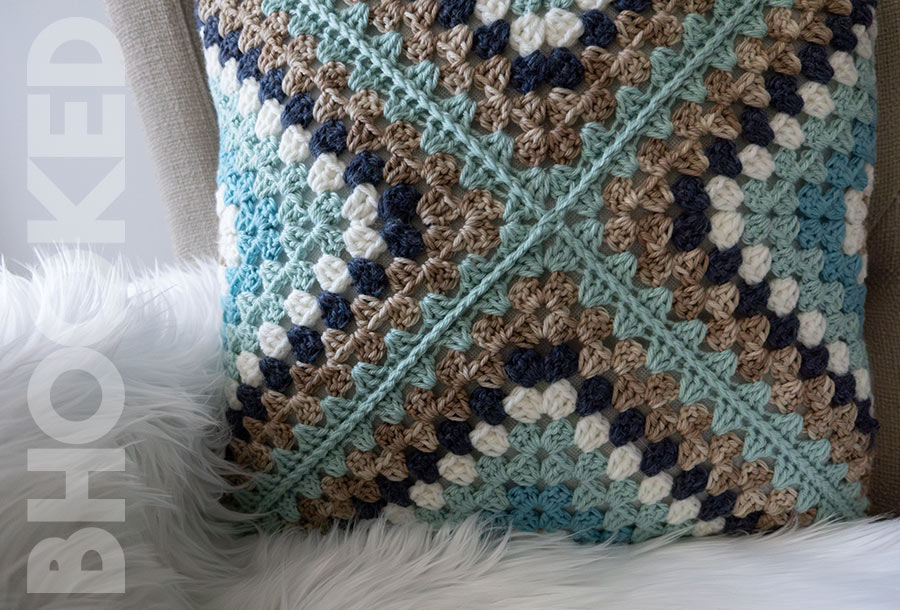
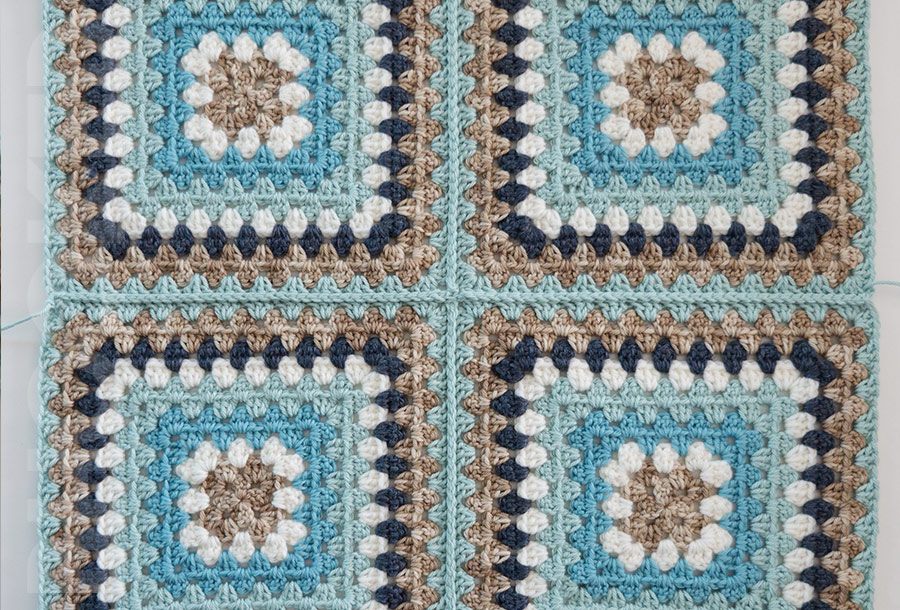
When I decided to make a granny square pillow for our home, I wanted to do something different. Instead of joining the squares in a regular grid, I made four big squares and joined them at an angle.
This creative way of joining makes the pillow look more modern and you don’t need as many granny squares. So if you’re short on time, this project is perfect! You only need four squares!
About Our Modern Granny Square Pillow Pattern
This easy granny square pillow is a great way to get better at making granny squares. But here’s the twist: you’ll connect them together on a diagonal, giving the pillow a fresh, one-of-a-kind style. And you can have fun trying out different colors for each square to make your pillow totally unique.
Check out the instructions below to learn how to make these cute covers. Below, you’ll find instructions for making this modern granny square pillow. Keep reading for more details and answers to common questions, or go straight to the free pattern.
Don’t know how to crochet a granny square yet? No worries! We have a beginner-friendly How to Crochet a Granny Square guide that’ll walk you through it step-by-step.
Pattern Overview:
- Supplies
- Buy the ad-free, printable pattern
- Abbreviations
- Pattern Notes
- Gauge & Finished Size
- Simple Crochet Pillow Pattern
- Crochet Granny Square Video Tutorial
- Finishing the Squares
- Joining the Squares Together
- Can I Use a Different Yarn?
- How Can I Make It Bigger?
- How Can I Make It Smaller?

You can view the pattern completely free on this page. But, if you prefer having a digital copy that you can save or print, we’ve got you covered with that option as well.
If you’d like to support our work here at B.Hooked, purchasing the digital pattern is a wonderful way to do so!
Recommended Supplies
- Approx 504 yds total; Medium-Weight (#4) Yarn
- 5 mm Crochet Hook
- 16″ Pillow form
- Yarn needle
- Stitch Marker
- Scissors
This is a great project to use up leftover yarn! Any medium-weight yarn you have will work for this pillow. It even looks nice to mix different yarn textures! I used some discontinued stash yarn for the pillow you see in the pictures. While you won’t be able to buy this yarn today, you can use the color palette as inspiration for your pillow!
You can crochet the colors in your granny squares randomly, but planning the colors a little before you start might be helpful.
The outermost colors in your squares will be the most visible on your pillow.
It’s also easy to customize the size of your pillow if you have a larger pillow form. Just make sure the diagonal corner measurement is 1 inch smaller than your pillow form. This will let the cover stretch for a better fit.

If you want to make a pillow that looks just like this one, you’ll need:
- Color A: 144 yds
- Color B: 88 yds
- Color C: 72 yds
- Color D: 135 yds
- Color E: 44 yds
Abbreviations
This pattern is written using standard US crochet terminology.
- Bet Between
- Ch Chain
- Cont Continue
- Dc Double Crochet
- Rem Remaining
- Sc Single Crochet
- Slst Slip Stitch
- Sp Space
- St(s) Stitch(es)
Pattern Notes
For the best results, we recommend blocking your granny squares before joining them. Blocking will perfect the shape of each square so they look better when joined. If you’re new to blocking or need a refresher, we’ve got you covered! Take a moment to read through our granny square blocking guide here.
There are many ways to crochet a classic granny square like the ones in this pillow. Crocheters have tried to perfect the overall look of their squares over time by trying different things.
After doing an extensive test of all the popular tips for crocheting the neatest granny squares, and publishing our findings here, you can be confident that our version of the granny square found in this pattern will give you a neat and tidy square.
Additionally, you should know that the chain 5 at the beginning of each square includes 2 corner chains and 3 chains for a double crochet.
Gauge:
5 rounds = about 4.5″
Granny Squares = 15″ measured diagonally at opposite corners
Finished Size:
16″ x 16″
Simple Crochet Pillow Pattern Instructions
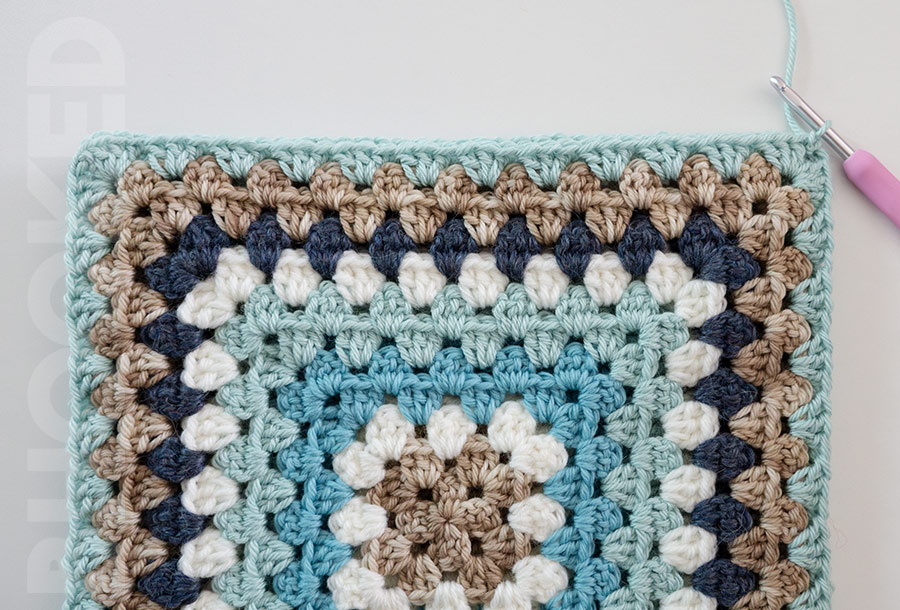
Granny Squares (Make 4)

Round 1: With color A, make a magic ring with the following: [3 dc, ch 2] four times. Close the magic ring and join with a slst to the first dc. Flip the square to the opposite side. This will make sure the granny square doesn’t “lean” or “spiral”.
Round 2: Slst in the same ch 2-sp, ch 3 (counts as a dc) then make 2 dc in the same ch 2-sp. *In the next ch 2-sp, make 3 dc, ch 2, 3 dc. Rep from *2 more times. In the first ch 2-sp, make 3 more dc, ch 1, and join with a slst to the 3rd ch. Flip the square to the opposite side. Break color A, and join color B.
Round 3: Slst in the same ch 2-sp, ch 3 (counts as a dc) then make 2 dc in the same ch 2-sp. * In the sp bet the next 2 dc clusters, make 3 dc. In the next ch-2 sp (3 dc, ch 2, 3 dc). Rep from * two more times. In sp bet next 2 dc clusters, 3 dc. In the first ch 2-sp, make 3 more dc, ch 1, and join with a slst to the 3rd ch. Flip the square to the opposite side. Break color B, and join color C.
A digital pattern is available in our shop so you can print out the pattern

Round 4: Slst in the same ch 2-sp, ch 3 (counts as a dc) then make 2 dc in the same ch 2-sp. *[In sp bet next 2 dc clusters, 3 dc] twice. In the next ch-2 sp (3 dc, ch 2, 3 dc). Rep from * two more times. [In sp bet next 2 dc clusters, 3 dc] twice. In the first ch 2-sp, make 3 more dc, ch 1, and join with a slst to the 3rd ch. Flip the square to the opposite side.
Round 5: Slst in the same ch 2-sp, ch 3 (counts as a dc) then make 2 dc in the same ch 2-sp. *[In sp bet next 2 dc clusters, 3 dc] three times. In the next ch-2 sp (3 dc, ch 2, 3 dc). Rep from * two more times. [In sp bet next 2 dc clusters, 3 dc] three times. In the first ch 2-sp, make 3 more dc, ch 1, and join with a slst to the 3rd ch. Flip the square to the opposite side. Break color C, and join color D.
Round 6: Slst in the same ch 2-sp, ch 3 (counts as a dc) then make 2 dc in the same ch 2-sp. *[In sp bet next 2 dc clusters, 3 dc] four times. In the next ch-2 sp (3 dc, ch 2, 3 dc). Rep from * two more times. [In sp bet next 2 dc clusters, 3 dc] four times. In the first ch 2-sp, make 3 more dc, ch 1, and join with a slst to the 3rd ch. Flip the square to the opposite side. Break color C, and join color D.
Round 7: Slst in the same ch 2-sp, ch 3 (counts as a dc) then make 2 dc in the same ch 2-sp. *[In sp bet next 2 dc clusters, 3 dc] five times. In the next ch-2 sp (3 dc, ch 2, 3 dc). Rep from * two more times. [In sp bet next 2 dc clusters, 3 dc] five times. In the first ch 2-sp, make 3 more dc, ch 1, and join with a slst to the 3rd ch. Flip the square to the opposite side. Break color D, and join color B.
Round 8: Slst in the same ch 2-sp, ch 3 (counts as a dc) then make 2 dc in the same ch 2-sp. *[In sp bet next 2 dc clusters, 3 dc] six times. In the next ch-2 sp (3 dc, ch 2, 3 dc). Rep from * two more times. [In sp bet next 2 dc clusters, 3 dc] six times. In the first ch 2-sp, make 3 more dc, ch 1, and join with a slst to the 3rd ch. Flip the square to the opposite side. Break color B, and join color E.
Round 9: Slst in the same ch 2-sp, ch 3 (counts as a dc) then make 2 dc in the same ch 2-sp. *[In sp bet next 2 dc clusters, 3 dc] seven times. In the next ch-2 sp (3 dc, ch 2, 3 dc). Rep from * two more times. [In sp bet next 2 dc clusters, 3 dc] seven times. In the first ch 2-sp, make 3 more dc, ch 1, and join with a slst to the 3rd ch. Flip the square to the opposite side. Break color E, and join color A.
Round 10: Slst in the same ch 2-sp, ch 3 (counts as a dc) then make 2 dc in the same ch 2-sp. *[In sp bet next 2 dc clusters, 3 dc] eight times. In the next ch-2 sp (3 dc, ch 2, 3 dc). Rep from * two more times. [In sp bet next 2 dc clusters, 3 dc] eight times. In the first ch 2-sp, make 3 more dc, ch 1, and join with a slst to the 3rd ch. Flip the square to the opposite side.
Round 11: Slst in the same ch 2-sp, ch 3 (counts as a dc) then make 2 dc in the same ch 2-sp. *[In sp bet next 2 dc clusters, 3 dc] nine times. In the next ch-2 sp (3 dc, ch 2, 3 dc). Rep from * two more times. [In sp bet next 2 dc clusters, 3 dc] nine times. In the first ch 2-sp, make 3 more dc, ch 1, and join with a slst to the 3rd ch. Flip the square to the opposite side. Break color A, and join color D.
Round 12: Slst in the same ch 2-sp, ch 3 (counts as a dc) then make 2 dc in the same ch 2-sp. *[In sp bet next 2 dc clusters, 3 dc] ten times. In the next ch-2 sp (3 dc, ch 2, 3 dc). Rep from * two more times. [In sp bet next 2 dc clusters, 3 dc] ten times. In the first ch 2-sp, make 3 more dc, ch 1, and join with a slst to the 3rd ch. Flip the square to the opposite side. Fasten off and weave in the ends.
Finishing the Squares
Since this pattern has you flip the granny squares from one round to the next, they should look pretty square right off the hook, and you shouldn’t need to do anything special to get a perfect shape. But if you think your squares need a little something to look better, blocking is always a great option.
Blocking will set the stitches into a perfectly square position so your pillow will look more polished and professional.
You’ll need a surface to pin your squares to during the blocking process. They make special mats for this called “blocking mats,” or alternatively, you can use foam tiles. Lastly, you’ll need some rust-free pins. This post will show you how to block them step-by-step.
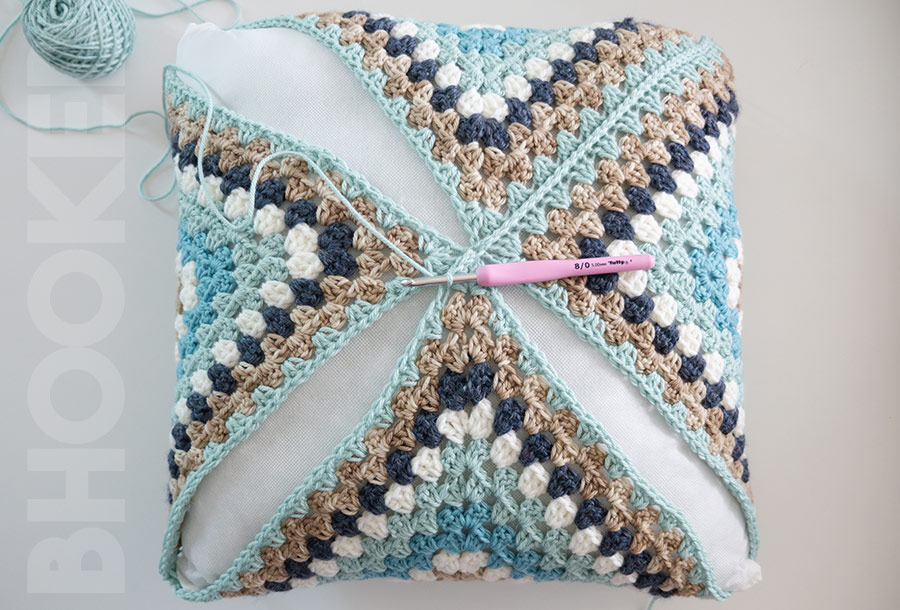
Assembling the Pillow

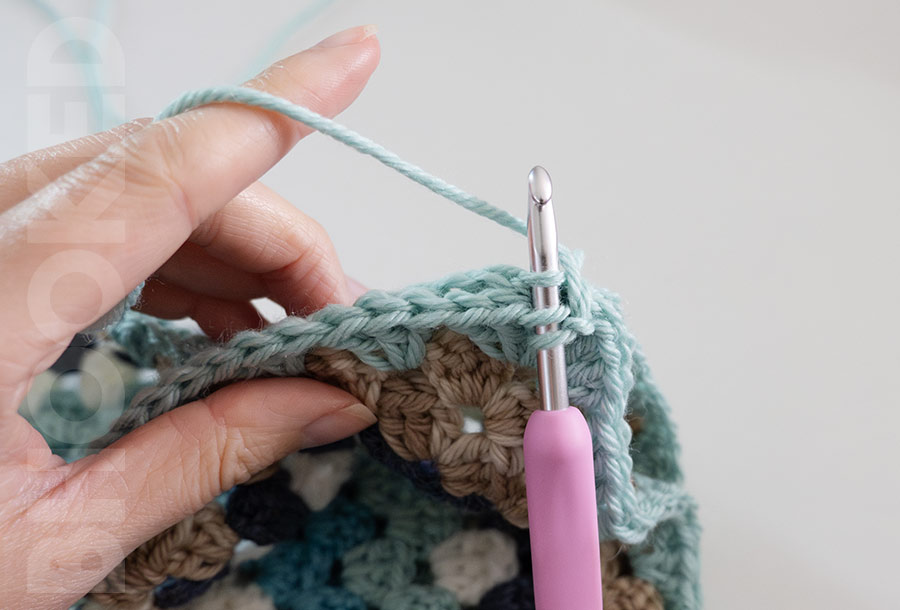
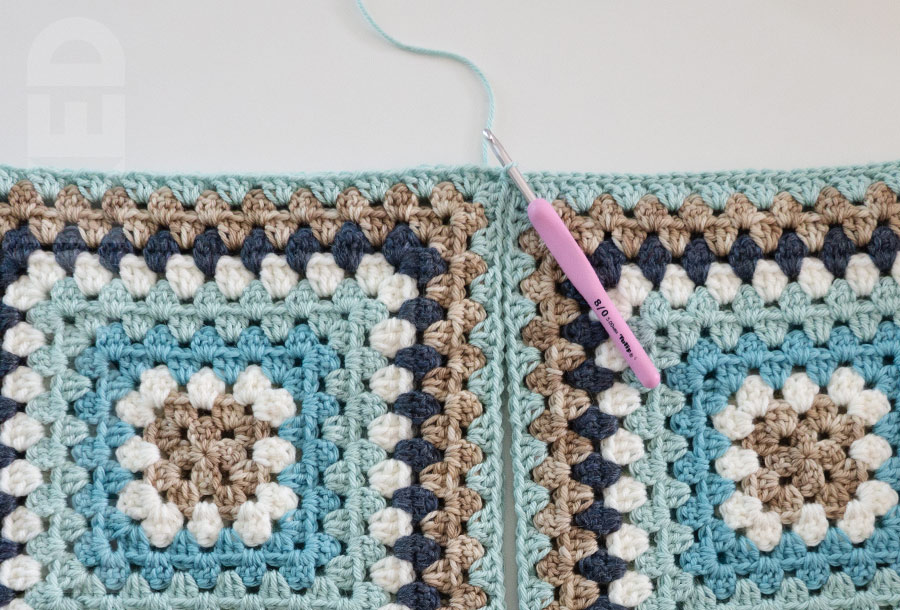
Step 1: Place two squares on top of one another, with the right sides facing outward (both sides look really similar so choosing the “right side” is completely up to you!). Join the same color yarn as your last round in the corner space of both squares.
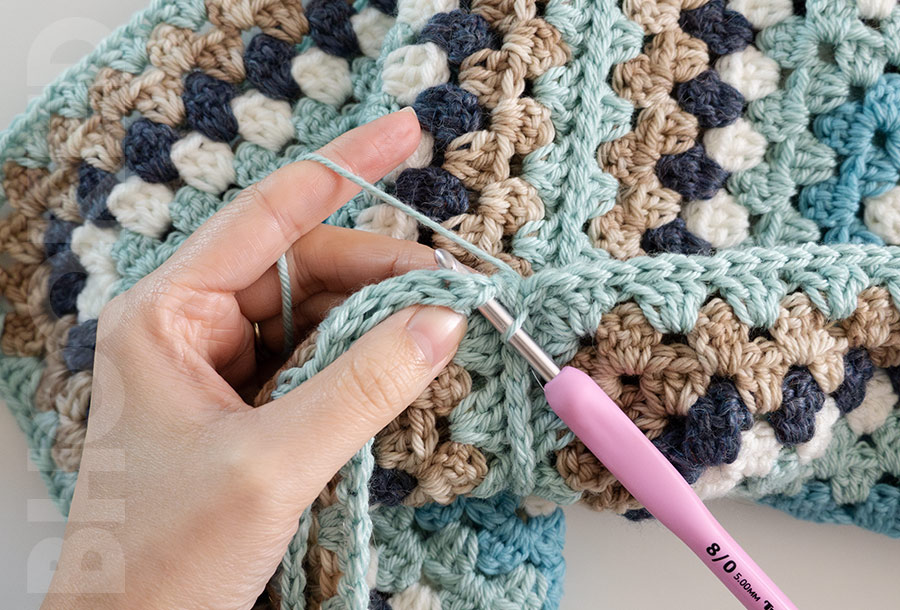
Step 2: Using the outer loops of both granny squares, make 1 slst in each dc, until you reach the opposite corner. Make a slst in this corner of both granny squares too.
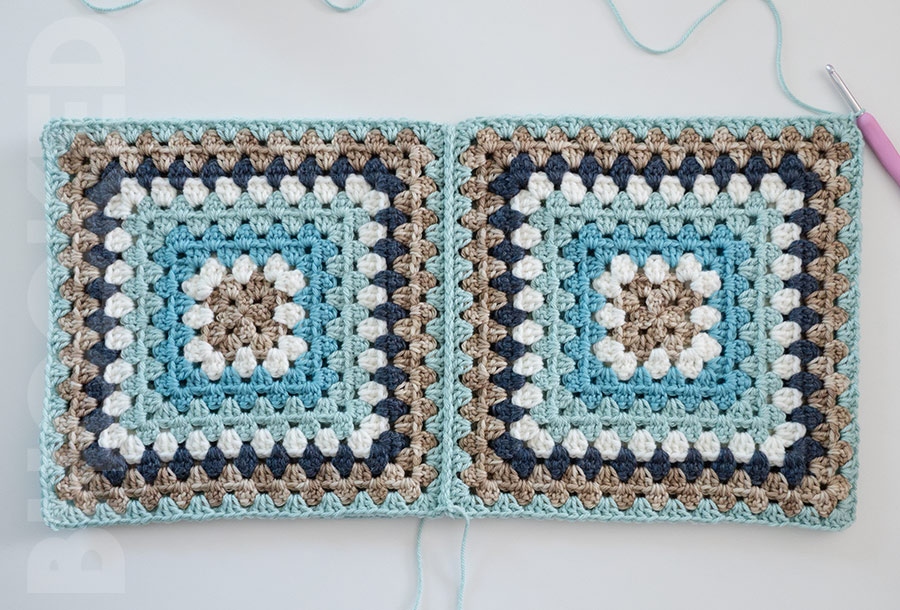
Step 3: Grab the remaining two granny squares, lay them together in the same way, and slst in the corner of both of these new squares to connect them to the first two.
Step 4: Make a slst in the outer loops of the new granny squares until you reach the opposite corner. Slst in the corner, then fasten off.
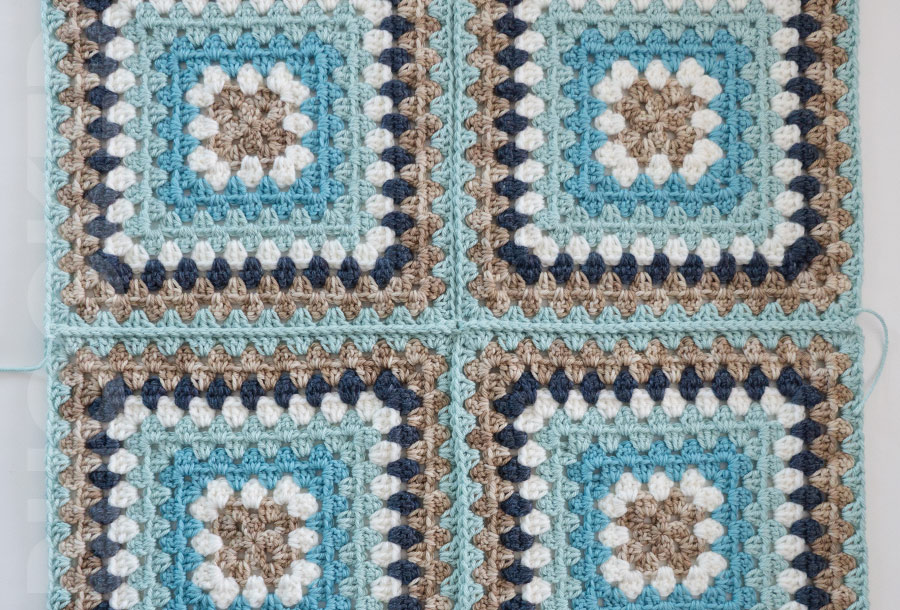
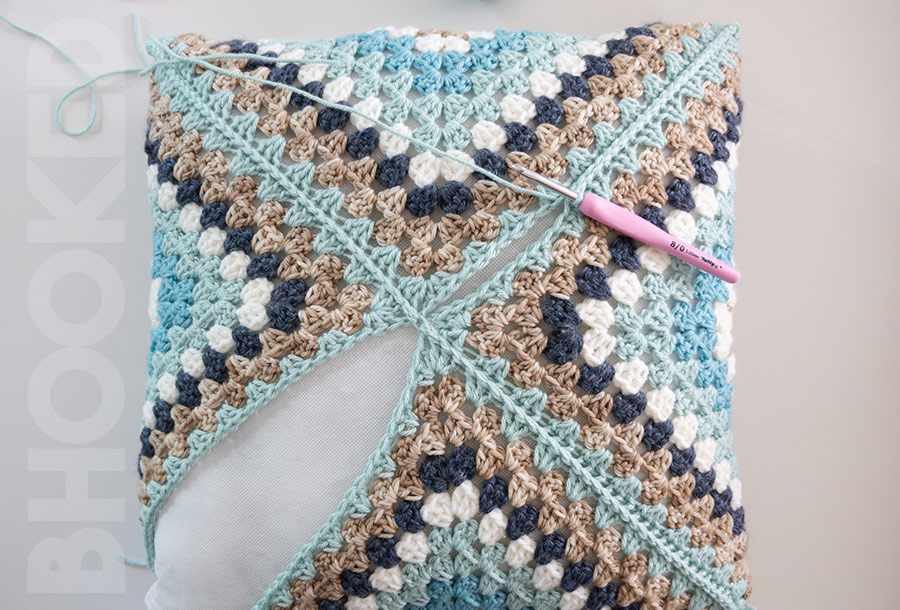
Step 5: At this point, you have one big square made up of four granny squares, and you have one join. Now rotate your square, and join them along the other direction.
When you get to the middle, simply slst in the corner of the next two granny squares, working over your previous join.
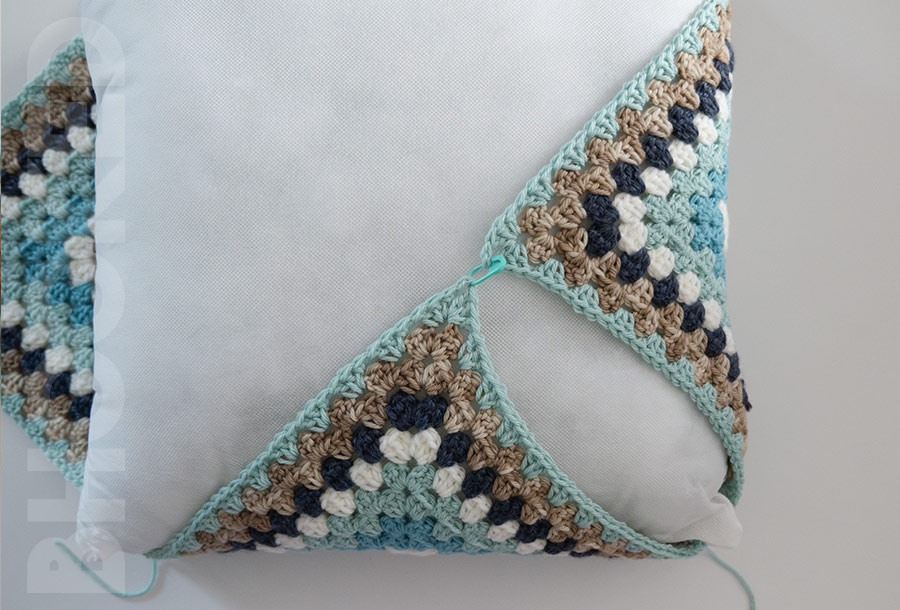
Step 6: Now your joins look like this:
Flip it over so the right side is facing down. Then place your pillow form on top. Fold two corners in, and use a stitch marker to help hold them together if you need.
Step 7: Fasten on in the corner, catching both granny squares, and using the outer loops like before, slst in every double crochet to the marker.
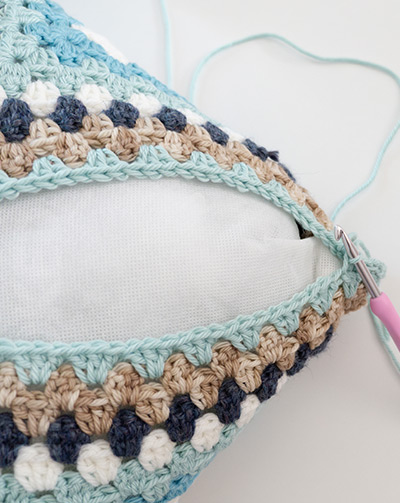
Step 8: Then pull the remaining sides in, and join in the same way. When you reach the opposite corner, fasten off.
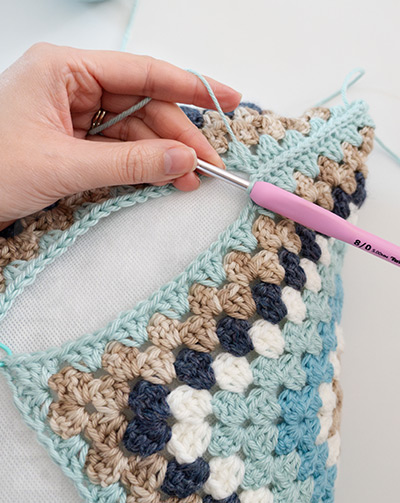
Step 9: Join along the last remaining edge in the same way. Fasten off and weave in your ends.
By using this pattern, you agree to our terms of use:
This pattern is for personal use only. You agree not to modify, publish, transmit, sell, create derivative works or in any way exploit any of the content within this page, in whole or in part. If you wish to share this pattern, share a link to this webpage only. You may sell finished items made from this pattern.
Copyright, B.Hooked Crochet, LLC
Frequently Asked Questions About Our Simple Crochet Pillow Pattern
Can I use a different yarn for my simple crochet pillow?
Sure, as long as it’s a #4 medium-weight yarn. Check your gauge and adjust as needed so the sizing comes out right. The recommended yarn amount will likely be different too.
Learn more about substituting a different yarn for a pattern like this in our comprehensive yarn substitution guide here.
If Caron Simply Soft Yarn isn’t available near you, you can check YarnSub.com for similar options.
How can I make my simple crochet pillow bigger?
There are two ways you can make this simple crochet pillow bigger. The first option is to use a thicker yarn and a bigger hook while following the same pattern. This method will increase the gauge of the stitches, resulting in bigger squares and therefore a bigger bag. You can learn more about gauge in our Ultimate Gauge Guide for Crocheters and Knitters here.
The other way you can make your granny square bag bigger is to add another round or two to your squares.
How can I make my simple pillow smaller?
The easiest way to make your pillow smaller is to make the squares with fewer rounds. Try using only 3 or 4 rounds and see if that gives you the size you want.
*Disclosure: Some of the links in this post are affiliate links, which means as an Amazon Associate, I earn from qualifying purchases made through these links. Please note that prices and availability of products are subject to change. This comes at no additional cost to you and helps support the content on this site. I only recommend products that I have personally used and genuinely believe in. Thank you for your support!


