Ready to learn how to crochet?
Crochet is an amazing hobby. It’s portable, affordable, doesn’t require a lot of tools, and produces functional and beautiful creations. But aside from all that, I believe that crochet can do more for you than just make pretty things!
In this step-by-step guide, we’ll cover everything you need to learn how to crochet from the basics like holding the hook and yarn, basic stitches, and some tips for finding your first projects.
It’s my goal for this to be your only resource for learning how to crochet.
UPDATED: OCTOBER 9, 2023 BY BRITTANY
This post may contain affiliate links.
There’s a lot of information on this page, but take it one section at a time to learn how to crochet. I’ll be sure to include all the resources you need to be successful!
Here’s a quick overview of the topics we’ll cover in this article:
- What You Need to Get Started
- What Yarn Should You Use?
- What Hook Should You Use?
- Yarn Needle and Scissors
- Should You Pick a Pattern First?
- Step 1: Make a Slip Knot
- Step 2: Holding the Hook & Yarn
- Step 3: Make the Chain Stitch
- Step 4: Learn the Single Crochet Stitch
- Step 5: Learn the Half Double Crochet Stitch
- Step 6: Learn the Double Crochet Stitch
- Step 7: Learn the Treble Crochet Stitch
- Step 8: Adding More Yarn
- Step 9: Finishing a Project
- Step 10: Picking Your First Project!
- What are Turning Chains?
- Where to Find More Crochet Patterns
- Frequently Asked Questions About How to Crochet
- How to Crochet for Beginners: Full Step-by-Step Video
What You Need to Get Started
One of the greatest things about crochet is its simplicity when it comes to supplies. With just a few essentials—yarn, a crochet hook, a yarn needle, and a trusty pair of scissors—you have everything you need to bring your creative visions to life.
What Yarn Should You Use?
When you’re just starting to learn how to crochet, picking the right yarn can make a big difference. As a beginner, you’ve got a lot to focus on, so go for something that keeps it simple. Opt for a smooth, medium-weight acrylic yarn, or cotton yarn will do the trick too! Using these types of yarn will ensure that your crochet journey is enjoyable and stress-free.
I recommend looking at…
- Lion Brand Heartland
- Red Heart Soft
- Caron Simply Soft
- Loops & Threads Impeccable
- I Love This Yarn
These yarns have a few things in common: they’re all twisted together from multiple strands (aka plied yarns), feel smooth, and fall into the worsted weight category.
While you don’t have to use the exact yarns in this list, it’s smart to think about how thick and smooth your yarn is when you choose one to learn how to crochet.
Now, if you’re eyeing those fuzzy-looking yarns, it’s better to resist the temptation…for now. Fuzzy yarns can make it hard to see your stitches as you crochet (that’s called ‘low stitch definition’). This can be tricky, especially if you’re just starting out.
It’s a good idea to get comfortable with the techniques we’ll cover in this guide before diving into those super soft and fuzzy yarns.
So how much do you need? Start with one skein at first. That’ll be plenty to experiment with and make the swatches I’ll teach you in this guide.
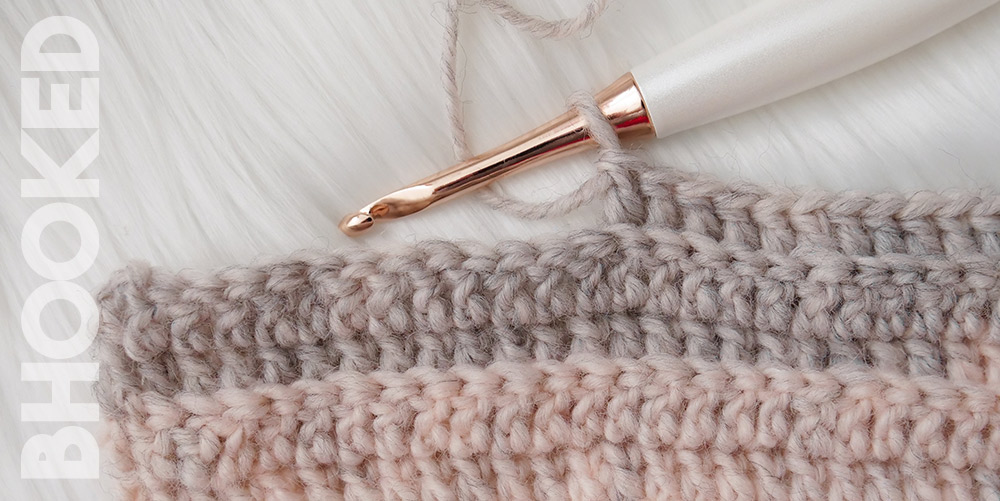
What Hook Should You Use?

Crochet hooks come in a variety of shapes and sizes, so which one should you use? Well, the perfect crochet hook is really a matter of personal preference.
The hook showcased here is my absolute favorite:
the Tulip Etimo crochet hook.
While they may not be readily available in your local craft stores, you can easily find them on Amazon to experience the pleasure of working with these hooks.
Different materials to consider…
- Metal (smooth & allows the yarn to glide easily over it)
- Plastic (smooth but the yarn glides more slowly over it)
- Wood (also smooth and the yarn glides more slowly over it)
Picking the right crochet hook is important because it can make a big difference in how much you enjoy crocheting. If you’ve got a hook that’s uncomfortable, snags on your yarn, or just feels like it’s working against you, it can turn a fun activity into a frustrating one real quick.
So, here’s what I suggest: Get yourself a metal hook, a plastic one, and a wooden one. Then, give each of them a try with the tutorials below. You’ll figure out pretty fast which one you enjoy working with the most!
Which size do you need? The best way to figure out what crochet hook sizes to go with is to look at the yarn label. Towards the back of the label, you’ll see something like this…
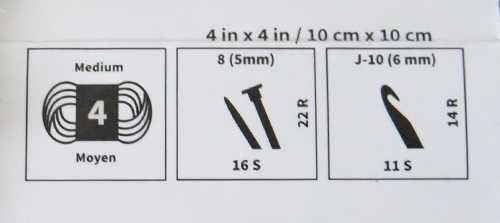
For this yarn, a 6 mm (J-10) size hook is a great place to start. So when you’re at the store getting your supplies, look at the yarn label and buy the hook size recommended there.
It’s not the only size that can be used with the yarn (and in future projects, you should always follow the hook size in the pattern) but since you’re just picking a yarn to learn how to crochet, this is the best way to figure out what hook size to buy so you can follow along with the rest of this guide.
Yarn Needle and Scissors
After you finish a crochet project, you’ll often have some loose ends to deal with. These ends include where you started, where you finished, and any extras if you added new yarn or changed colors along the way.
To make them neat and tidy, you’ll need two trusty tools: a yarn needle for weaving and, of course, a good pair of scissors. These are must-haves to give your project that polished look.
Now, when it comes to choosing a yarn needle:
- Go for one with a big enough eye so you can easily thread the yarn through.
- Stay away from plastic needles; they can be a bit snaggy.
- Consider getting a set with different sizes.
Chibi bent tip needles by Clover are my absolute favorite, and you can order them on Amazon pretty cheap!
That’s it! All you really need are four things: some yarn, a hook, a yarn needle, and your trusty scissors. You might see lots of cool gadgets and accessories when you shop for crochet stuff, and it’s fun to explore them.
Now, one more important thing we need to touch on before we get started, and it’s not a wildly popular idea.
Should You Pick a Pattern First?
Maybe you found an amazing crochet project on Pinterest and you can’t wait to make it. But here’s the deal: it’s not the best idea to learn how to crochet with a pattern right away.
When you’re just starting out, everything about crocheting feels new and maybe a bit awkward. Your first tries might not look perfect – that’s totally okay!
So I encourage you to follow through with all 10 steps of this guide before you start on your first actual project.
I want you to keep that excitement for your dream project while being realistic. Know that your early attempts won’t be flawless. Even if you do everything right, it takes practice to get those perfect stitches. Your skills will get better with time, and your stitches will look smoother.
That’s why I’m a big advocate for learning how to crochet with small stitch swatches. These little practice pieces help you get the hang of it and build confidence. Then once you feel more at ease, you can try making your first real project. I’ve got some ideas for those at the end of this guide!
How to Crochet Step 1: Make a Slip Knot
The slip knot is what you create to get the yarn attached to the crochet hook. There are a few different ways to make this knot but the result is the same – a knot with a sliding loop to put the hook through to get your project started.
Here’s how to do it:
How to Crochet Step 2: Holding the Hook & Yarn
Getting the hang of holding the hook and yarn is probably what you’ll struggle with the most. It’ll feel completely awkward, and you’ll feel completely uncoordinated…for a while. But the good news is that it’ll eventually just click. You just have to stick with it long enough for that to happen.
Two Common Ways to Hold the Crochet Hook
First things first, there are two ways to hold the crochet hook:
“Knife” Grip

“Pencil” Grip

While there’s no right or wrong way to hold the hook, one of these styles will feel more natural for you. The only way to find that out though is to try them both.
Remember that it’ll all feel awkward for a little while, but you’ll feel more comfortable with one of these grip styles.
When it comes to gripping the crochet hook, it’s all about what feels right to you. So go ahead and give both grips a try, and see which one clicks with you. It’s all about finding that sweet spot where you feel most comfortable and in control. In both grips, you grasp the hook with your thumb and first few fingers, but the difference is where the end of the hook rests.
Holding the Yarn While You Crochet
In order for you to be able to catch the yarn with your hook, you have to have some “tension” on the yarn. This tension comes by holding the yarn strategically in your non-hook hand.
For the “knife grip”, your index finger is usually up in the air, and the yarn flows up and over. This gives you space to grab the yarn with the hook, but it also creates the tension you need to do anything with it.
Here’s what that looks like:
It helps to wrap the yarn around your pinkie so you can keep a steady tension on the yarn. Even if you’re not sure what that means yet, it’s a good habit to get into. Let the yarn flow over your index finger so you can grab the yarn with your hook.
How to Crochet Step 3: Make the Chain Stitch
After you make a slip knot and learn how to hold the yarn, the next thing to master is the chain stitch. Sometimes called “the foundation chain” or the “starting chain”, this stitch really is the foundation for almost every project you’ll start from here on out. There are a couple of exceptions when you don’t start with a foundation chain, but that’s not super important for you to worry about right now.

With the slip knot on your hook and the yarn in your hands, keep making chains until it all feels comfortable. Don’t worry about how long your chain gets to be – just keep going until it starts to feel natural (you can rip it out later and reuse the yarn).
Here’s a quick video to show you how it’s done:
Practice:
Keep making chains until it feels natural for you. Don’t worry about how many you’re making or how long your chain gets to be. You can unravel it and re-use the yarn in later steps.
The most important takeaway from this step of the crocheting process is to make sure that your chains are even in size and shape, and that you feel like you’ve found a “groove”.
When you accomplish this, the next step will be to make your first swatch of stitches.
Nearly all crochet stitches are made from a combination of these four basic stitches:
- The Single Crochet
- The Half Double Crochet
- The Double Crochet
- The Treble Crochet
How to Crochet Step 4: Learn the Single Crochet Stitch
The single crochet is the first stitch you should learn after mastering the chain stitch, and the best way to do that is to make a little swatch.
If you haven’t already unraveled your chain stitches, do that, leaving 13 chains.
Notice how one side of the chain looks like a braid, and the reverse side has a bunch of bumps…like a spine. Each bump is a place to make a stitch. To make the first single crochet, find the second bump from the hook. Then watch this video to see how to make the single crochet stitch:
Since you started with 13 chains initially, you should have 12 single crochet stitches total, and you shouldn’t have any more chain stitches left.
Now what?
When you reach the end of a row like this, the next step is to turn the work and start building the next row. Here’s how it’s done:
Single Crochet Practice
Keep adding single crochet rows to your swatch until it feels natural and your stitches look uniform. Again, don’t worry about how big your swatch gets to be. You can unravel it and re-use the yarn in later steps.
When you finish the last row you want to practice, trim the yarn leaving about 5 inches, and pull that tail through the loop on your hook to finish it off.
You may not be proud of this swatch now but hold on to it. You’ll look back on it fondly one day!
How to Crochet Step 5: Learn the Half Double Crochet Stitch
The half double crochet is the next basic crochet stitch you should learn. It’s a little bit taller than the single crochet, and incorporates a very common motion in crochet – the yarn over.
Start another swatch to learn this stitch. This time, make a slip knot and make 14 chains. Locate the third chain from the hook by looking at the bumps, and watch this video to see how to crochet the half double crochet:
This time you started with 14 chains, but you’ll have 12 stitches in the first row when you run out of chains to work into. That’s because the half double crochet needs two chains to get started.
Any time you reach the end of a row, remember to turn and start building the next row. Here’s how to do that with the half double crochet stitch:
Half Double Crochet Practice
As you did with your single crochet swatch, keep adding rows to your half double crochet swatch until it feels natural and your stitches start to look uniform. The goal is to start building your muscle memory – even if it’s incredibly difficult right now, it will get easier!
When you’re finished practicing the half double crochet, trim the yarn about 5″ from your hook and pull that tail through the loop on your hook.
How to Crochet Step 6: Learn the Double Crochet Stitch
The double crochet is the next stitch for you to learn. It’s a little taller than the half double crochet, and it’s the most common stitch you’ll find in projects.
Start another swatch to learn how to crochet the double crochet. This time make a slip knot and crochet 15 chains. Find the fourth chain from the hook by counting the bumps and watch this video to see how to crochet the double crochet stitch:
This time you started with 15 chains, but you still have 12 stitches in the first row when you run out of chains to work into. That’s because the double crochet uses three chains to get started.
Any time you reach the end of a row, remember to turn and start building the next row. Here’s how to do that with the double crochet stitch:
Double Crochet Practice
As you did with your single crochet and half double crochet swatches, keep adding rows to your double crochet swatch until it feels natural and your stitches look uniform.
When you’re finished practicing the double crochet, trim the yarn about 5″ from your hook and pull that tail through the loop on your hook.
How to Crochet Step 7: Learn the Treble Crochet Stitch
The next stitch for you to learn and master is the treble crochet stitch. It’s a little taller than the double crochet, and while used less in projects, it’s still really useful to know.
Start another swatch to learn how to crochet the treble crochet. This time make a slip knot and crochet 16 chains. Find the fifth chain from the hook by counting the chain bumps, and watch this video to see how to crochet the treble crochet stitch:
This time you started with 16 chains, but you still have 12 stitches in the first row when you run out of chains to work into. That’s because the treble crochet uses three chains to get started.
Any time you reach the end of a row, remember to turn and start building the next row. Here’s how to do that with the treble crochet stitch (pay close attention to how many times you yarn over to start this stitch):
Treble Crochet Practice
As you did with your single crochet, half double crochet, and double crochet swatches, keep adding rows to your treble crochet swatch until it feels natural and your stitches look uniform.
When you’re finished practicing the treble crochet, trim the yarn about 5″ from your hook and pull that tail through the loop on your hook.
How to Crochet Step 8: Adding More Yarn
You probably won’t run out of yarn when working through this guide and making your swatches but knowing how to add a new ball of yarn is another must-know skill. Since you’re just starting out, let’s keep this as simple as possible and add the new yarn at the end of a row.
You can cut your yarn at the end of the row in your swatch to give this a try or simply watch the tutorial and take a mental note for when you need to add more yarn to your project in the future. This tutorial will show you how to add new yarn for all of the four basic stitches:
How to Crochet Step 9: Finishing a Project
When you finish a project there are two things you’ll need to do to wrap it up – fasten off so the project doesn’t unravel itself and weave in the ends so it looks complete.
Fastening off is a really simple technique. It’s done the same no matter what stitch you’re working but we broke this tutorial down so you can see how to fasten off no matter which of the basic stitches you’re working with. Here’s how to do it:
Weaving in the ends is the next thing you’ll need to do. It’s an important step you won’t want to skip. It’s how you hide the tails from the beginning and end of the project as well as any additional ends from adding new yarn to the project. Here’s how it’s done:
You’ll get more and more comfortable weaving in ends the more you do it. Here’s an article with six tips for weaving in ends like a pro. It’s a worthwhile read when you’re ready!
How to Crochet Step 10: Picking Your First Project!
By now, you’ve hopefully followed along with all the tutorials in this guide and taken the time to create a couple of swatches for each of the basic four stitches. Now for the fun part!
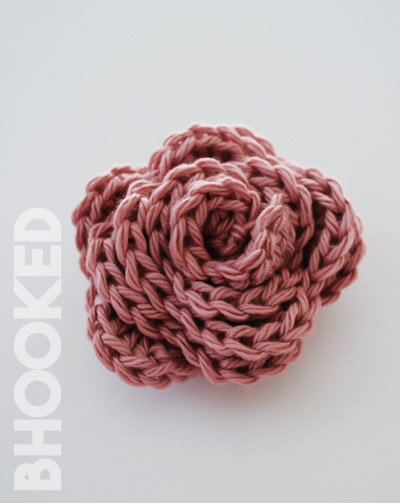
Making beginner-friendly crochet patterns with step-by-step tutorials is kind of my thing. I have several projects for you to choose from. So think about the type of project you want to make and click the image to be taken to the pattern and step-by-step tutorial:


What Are Turning Chains?
When you reach the end of a row in your crochet project and want to start a new row, a smooth transition is key. That’s where the turning chain comes to the rescue!
Think of the turning chain as a chain of stitches you create at the beginning of each new row. Sometimes, your pattern might instruct you to chain three at the end of a row, while others may ask you to turn your work and chain a specific number at the start of the next row. Don’t worry, both methods achieve the same result!
So, why do we bother with this turning chain? Well, it’s pretty nifty! The turning chain adds a bit of height to your work, preventing the first few stitches from being squished together. This ensures that your project maintains its proper size and shape.
In a nutshell, the turning chain serves as a foundation for the next row, giving your stitches room to breathe. Whether you chain three at the end of a row or a different number at the beginning of the next row, it’s all about finding that perfect balance.
Remember, each pattern might have its own specific instructions for the turning chain, so make sure to follow the guidance provided.
Each Stitch Has Its Own Turning Chain Number:
In the crochet community, there is a general practice of assigning a specific number of turning chains to different stitches. It’s widely accepted and helps maintain consistency in crochet patterns.
- Single Crochet Stitch = 1 turning chain
- Half Double Crochet Stitch = 2 turning chains
- Double Crochet Stitch = 3 turning chains
- Treble Crochet Stitch = 4 turning chains
- Double Treble Crochet Stitch = 5 turning chains
and so on, adding one turning chain for each height level of the stitch. As a beginner, you don’t need to worry too much about the exact number of turning chains for each stitch. It’s something you’ll learn and become familiar with as you gain experience. The important thing is to be aware that turning chains exist and they play a role in your crochet projects.
Where to Find More Crochet Patterns
Ravelry | This is the biggest pattern database you’ll find on the web. You’ll be able to filter through patterns of all shapes, sizes, and skill levels.
Yarn Manufacturers | Yarn companies like Red Heart, Yarnspirations, and Lion Brand have hundreds of free patterns to download on their websites. You can usually find a pattern printed on the inside of the yarn label too.
B.Hooked Crochet Patterns | You’ll find hundreds of free patterns here on this website. Just click on that link to be directed to our crochet patterns page.
Magazines | Whether you’re a digital or page-turner type, you’ll find a handful of crochet magazines that offer patterns as well as tips within their pages.
Books | You’ll find themed crochet pattern books all over Amazon and probably a few in your local book store too.
Pinterest | You’ll find thousands of pins for crochet patterns on Pinterest that are both free and paid for.
The most important thing to remember when choosing your first crochet project is to select one in the beginner category and it’ll be even more helpful if there’s a video tutorial for it too. That’s why the best place to find your first project is online rather than in a magazine or book. You won’t likely find a step-by-step tutorial to help you through the process of reading the pattern.
The other important thing to consider when choosing your first project is how long it will take to make. A blanket sounds like a really practical project but it can take dozens of hours to complete. If your first project is something that takes hours and hours to make, it’ll feel like you’re getting nowhere and you probably won’t have the motivation to finish it.
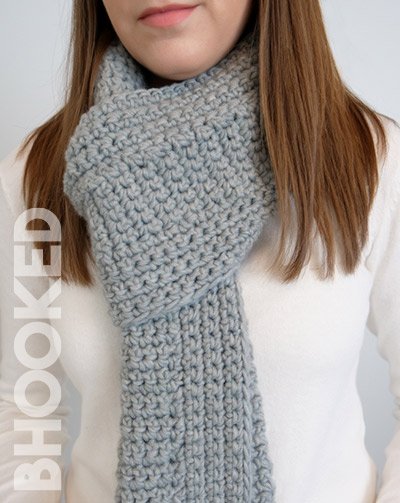
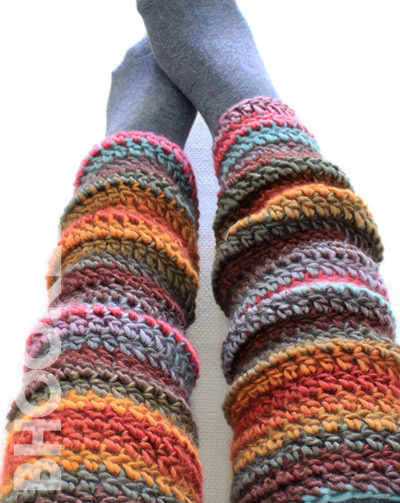
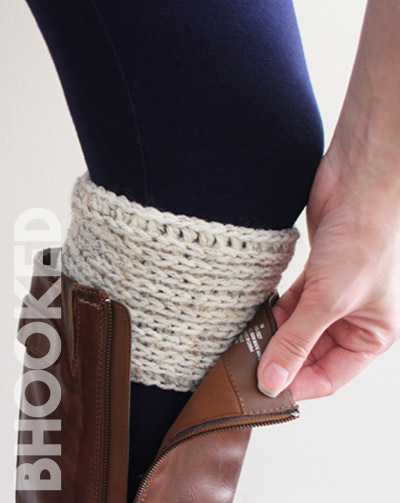
That’s why I recommend a “quick win” project – something you can crochet in a few hours or finish on a weekend. Something like a headband, mug cozy, boot cuffs, a small cowl, or a scarf with bulky yarn is the best place to start for your first project.
Frequently Asked Questions About How to Crochet
What materials do I need to start crocheting?
All you need are yarn, a crochet hook, a yarn needle, and scissors.
What’s the best yarn for beginners?
Smooth, medium-weight acrylic or cotton yarn is ideal for beginners.
What’s the basic stitch I should start with as a beginner?
Start with the single crochet (sc) or the double crochet (dc) stitch for a strong foundation.
What do I do if my crochet stitches are too tight or too loose?
Practice and tension control are key. Experiment with different hook sizes and yarn types until you find what works for you.
What should I do if I make a mistake in my crochet project?
Don’t worry! Most mistakes can be fixed by unraveling a few stitches (frogging) or using a crochet hook to correct them.
What should I do if I make a mistake in my crochet project?
Don’t worry! Most mistakes can be fixed by unraveling a few stitches (frogging) or using a crochet hook to correct them.
Is it easier to knit or crochet?
It depends on personal preference. Some find knitting easier due to its repetitive nature, while others find crochet simpler because it involves only one active loop at a time.
What is the easiest thing to learn how to crochet?
The easiest thing to learn in crochet is usually the basic chain stitch (ch) or the single crochet (sc) stitch. These provide a solid foundation for more complex patterns.
Is it hard to learn how to crochet?
Crocheting can be challenging at first, especially for beginners. However, with practice and patience, many people find it becomes easier and more enjoyable as they gain experience.
How to Crochet for Beginners: Full Step-by-Step Tutorial
More of a visual kind of learner? I totally get it! This video will walk you through the entire process step-by-step.