Are you ready to learn cable knitting?
Knitting cables is something many knitters shy away from because it looks much harder than it really is. Cable knitting opens up a whole new world of possibilities for your projects, adding that extra “wow” factor to your knits! They’re perfect for a wide range of items like cozy sweaters, cardigans, hats, scarves, cowls, and even blankets and pillows.
UPDATED: DECEMBER 20, 2023 BY BRITTANY
This post may contain affiliate links. See our Disclosure Policy for more information.

In this comprehensive guide, we’ve got you covered when it comes to cable knitting. I’ll break it all down for you, step by step, so you can see just how easy and enjoyable cable knitting can be. Whether you’re a total newbie to cables or have had some struggles in the past, this guide is tailor-made for you.
I’ll take the mystery out of cable knitting and show you that it’s not as complicated as it may appear. So, let’s dive right in and unravel the mysteries of knitting beautiful cables starting with this…
Forget what you may have heard about cables being only for the knitting pros!
A cable is simply the result of working a single row of stitches out of order.
Despite their impressive appearance, they’re actually much simpler than they seem. In fact, anyone can master cable knitting with a little know-how. A basic cable pattern follows a straightforward repeat where one row involves working stitches out of order. Once you’ve got the hang of knitting stitches out of order, the possibilities for creating stunning cables are endless!
How you work the stitches out of order give each cable its unique look, but always remember: at their core, cables are simply the result of skillfully twisting stitches. With a bit of practice and creativity, you’ll be creating your own beautiful cables in no time!
Before we get to practicing, there are a few things you should know first.
1. To practice knitting cables, you need a cable needle.
To switch the stitch order on your needles, you’ll need a handy tool called a cable needle. These nifty tools come in various shapes and sizes, and while each has its advantages, it ultimately boils down to personal preference. In the additional resources section below, you’ll find a video where we demonstrate the use of a U-cable needle. It’s a great visual reference to help you get started with knitting basic cables.
Here are a few cable needles we’ve tried, loved and would recommend to a friend:
Disclosure: As an Amazon Associate (and at no additional cost to you) I earn a small commission from qualifying purchases if you use the links below. Please understand I have experience with these products & recommend them because they are optimal for this pattern, not because of the commission I make as a result of you buying them. Using these links is not required but is a big support!
If you’re not keen on adding another tool to your knitting collection, no worries! In a pinch, double-pointed needles can serve as a makeshift cable needle. So, if you already have a set of double-pointed needles on hand, you can use them as an alternative to a dedicated cable needle. It’s a handy trick that can save you from having to buy yet another notion.
2. You can knit a cable with any yarn but that doesn’t mean you should.
While it’s technically possible to knit cables with any type of yarn, it doesn’t necessarily mean you should. Here’s the thing: if you’re putting in the effort to create those beautiful cable stitches, you definitely want them to shine!
That’s why we highly recommend using a smooth yarn for cable knitting. Not only does it make it easier to see and knit the stitches, but it also allows the cable pattern to stand out and be admired. Yarns with a plied structure or even smooth roving yarns are our top choices when it comes to knitting cables.
When it comes to choosing yarn for cable knitting, wool and other animal fiber yarns are truly excellent choices. Why, you ask? Well, these yarns have a fantastic quality of flexing and stretching as you work with them. This elasticity makes them ideal for creating cables, as they can easily accommodate the twists and turns without losing their shape. Plus, the natural warmth and softness of wool and animal fiber yarns add an extra cozy touch to your cable-knit projects.
One option we suggest steering clear of as you’re learning to knit cables is cotton yarn. While you most certainly will come across smooth, plied cotton yarn varieties, it’s important to note that cotton’s inherent lack of stretch can pose a challenge when it comes to cabling. Don’t get us wrong, it’s definitely possible to knit cables with cotton yarn, but as a beginner practicing and learning the techniques, we wouldn’t recommend starting with it. Opt for yarns with more elasticity to make your cable knitting journey a bit smoother.
3. Invest in a swatch book with a good cable knitting section.
Before diving headfirst into a cable knitting project, trust us when we say that taking the time to make a swatch will be well worth it. Now, knitting cables isn’t necessarily difficult, but there’s a definite advantage to familiarizing yourself with the motions before incorporating them into a larger project. This will help you work through any tension issues before you start working on that precious project.
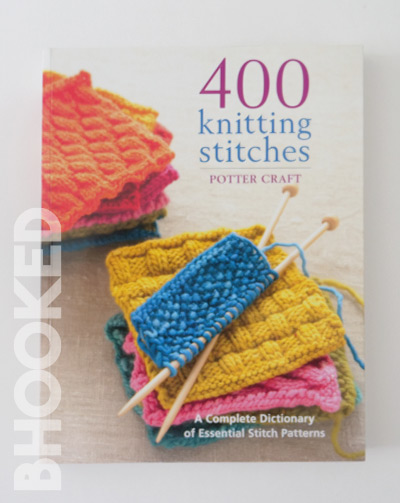
To get started, we highly recommend making several swatches from a knitting stitch book. One great resource we suggest is “400 Knitting Stitches: A Complete Dictionary of Essential Stitch Patterns” by Potter Craft.
This book features a fantastic section on knitting cables, offering over 35 different cable stitch patterns to practice with. You’ll find everything from basic cables to some fancy twists too. What sets this book apart is its clear written instructions and detailed descriptions on how to execute each cable twist. It’s truly a perfect companion for beginner cable knitters like yourself.
By the way, we want to be transparent with you. If you decide to purchase the book through the Amazon link provided above, we want to let you know that we’ll receive a small commission at no extra cost to you. However, we want to emphasize that our recommendation is not based on this commission. We genuinely believe in the value of this book because it has personally helped us learn how to knit cables through the process of making swatches. If it worked for us, we’re confident it can work for you too. So, if you choose to purchase the book, not only will you be enhancing your cable knitting skills, but you’ll also be supporting us in continuing to provide helpful knitting resources.
Now that we’ve covered the supplies and general recommendations, it’s time to dive into the nitty-gritty details of cable knitting. Get ready to unravel the secrets and master the art of cable knitting!
Basic Sections of Cable Patterns
When you take a close look at a cable swatch or a cozy cable knit fabric, you’ll spot two important players in the game. First, there’s the set of stitches that come together to form that gorgeous cable twist. And then, you’ve got the background stitches, the unsung heroes who make the cable shine even brighter. They work in harmony, creating that wow-factor you can’t help but admire. So, remember, it’s all about this magical combination of cable twists and background stitches that brings these patterns to life, making your knitting project a true cable-knit masterpiece.
Common Cable Abbreviations
In cable knitting patterns, you may come across various ways in which cable knitting abbreviations are presented. Here are some common cable abbreviations you might encounter in your patterns:
- C4B: Cable 4 Back. This means you will hold the next 2 stitches to the back of your work using a cable needle, knit the following 2 stitches, and then knit the 2 stitches from the cable needle.
- C4F: Cable 4 Front. This indicates that you will hold the next 2 stitches to the front of your work using a cable needle, knit the following 2 stitches, and then knit the 2 stitches from the cable needle.
- C2B: Cable 2 Back. This abbreviation instructs you to hold the next stitch to the back of your work using a cable needle, knit the following stitch, and then knit the stitch from the cable needle.
- C2F: Cable 2 Front. This abbreviation directs you to hold the next stitch to the front of your work using a cable needle, knit the following stitch, and then knit the stitch from the cable needle.
- Sl1, K2tog, PSSO: Slip 1, Knit 2 together, Pass slipped stitch over. While this abbreviation isn’t necessarily a cable itself, this abbreviation denotes a left-leaning decrease which is often used in cable patterns.
These are just a few examples of how cable knitting abbreviations may appear in a pattern. It’s important to note that each pattern may have its own unique set of abbreviations. Remember, when working with a cable knitting pattern, always refer to the pattern’s key for specific instructions and explanations of the abbreviations used. This will ensure you follow the pattern accurately and achieve the desired cable design.
However, in general, cable knitting abbreviations tend to follow a consistent format, typically including a letter or number indicating the type and direction of the cable, followed by “B” or “F” to indicate whether the stitches are held to the back or front of the work.
C#(f) or (b)
The “C” in cable knitting abbreviations indeed stands for “cable,” and it is typically followed by a number that represents the number of stitches involved in the cable.
Additionally, the letters “F” and “B” indicate “front” and “back,” respectively. These letters not only guide you on where to hold the cable needle while knitting but also indicate the direction in which the resulting cable will lean.
- When you hold stitches to the FRONT of your work, it creates a cable that leans LEFT.
- Conversely, holding stitches to the BACK produces a cable that leans RIGHT.
The combination of the cable number, the direction of the cable (front or back), and the way the stitches are twisted creates the distinctive cable patterns you’ll find in knitting.
In addition to the abbreviated form of cable instructions, you may also encounter more detailed instructions that provide further clarity on how to work the cable. For instance, a cable instruction could be written as “Cable 6 front (k3, k3),” which conveys the same information as the abbreviated form.
In this example, “Cable 6 front” indicates that you’ll be working a cable involving 6 stitches, and you’ll be holding them to the front of your work. The subsequent instructions, “(k3, k3),” specify that you knit the first 3 stitches, followed by knitting the next 3 stitches from the cable needle.
These additional details help provide a clearer picture of how the cable is formed and guide you through the specific knitting steps required.
Remember, whether you encounter the abbreviated form or a more detailed instruction, the key is to follow the pattern’s specific guidelines to achieve the desired cable effect.
Cable Knitting Aesthetics: Right and Left Leaning Cables
By mastering the technique of holding the cable needle to the front or back, you gain the ability to control the direction and aesthetics of your cable patterns. It opens up a world of possibilities to create beautiful textures and intricate designs in your knitting projects.
So the direction in which you hold the cable needle plays a crucial role in determining the direction or “lean” of the cable. It’s worth emphasizing this point because it greatly influences the overall appearance of your cable knitting.
When you hold the cable needle to the front of your work, the resulting cable will lean to the left (left twist).
When you hold the cable needle to the back of your work, the cable will lean to the right (right twist).
So remember, the direction of the cable needle determines the lean of the cable. Take your time, practice, and experiment to achieve the desired effect.
Knitting Cables In The Round
Now, let’s talk about knitting cables on circular needles. Working stitches out of order can sometimes make them snug on the needles. This isn’t usually a problem when knitting a flat piece with straight needles, but it can become tricky when knitting cables in the round.
When you finish the round with the cable twist, you may notice that the stitches suddenly “shrink,” causing them to no longer stretch evenly around the circumference of the circular needles. This can make it challenging to continue knitting the round since the stitches won’t fit properly.
To avoid this issue, it’s best to ensure that the circumference of the project you’re working on in the round is at least two inches larger than the circumference of your circular needles. This extra space will allow the stitches to comfortably accommodate the cable twists.
However, if you find yourself in a situation where you’ve already started a project on circular needles and can’t complete the round due to space constraints, you may need to switch to double-pointed needles or magic loop to finish the project.
Now, let’s say you’re feeling ambitious and want to create your own “in the round” project using cable instructions from a book like the one we recommended earlier. It’s important to note that flat cable knitting patterns won’t directly translate to working them in the round.
When knitting in the round, you’re always looking at the right side of the work since you never flip it. As a result, the cable instructions for knitting in the round will differ from those worked in rows.
A helpful guideline to adapt an “in rows” cable to an “in the round” cable is to follow the instructions for the right side of the work as they appear in the pattern. For the wrong side rows, work the opposite stitch (knit for purl or purl for knit) to maintain the correct pattern alignment.
By following this rule of thumb, you’ll be well on your way to translating a flat cable knitting pattern to accommodate your “in the round” project.
Practice: Basic Cable Knitting Swatch
With the basics out of the way, let’s say we get to knitting a basic cable swatch. You’ll need some worsted weight yarn, a needle size that coordinates with that yarn (use the yarn band for guidance if you’re not sure), a cable needle, yarn needle and scissors. Here’s a simple pattern to get you started:
Cast on 26 stitches using the long tail cast on. You can break this cast on number into the following groups of stitches to help you wrap your head around this swatch:
- 4 stitches = border edge
- 5 stitches = background stitches
- 8 stitches = cable twist
- 5 stitches = background stitches
- 4 stitches = border edge
Setup rows: Knit 4 rows in a garter stitch pattern (knit all stitches in each row). This will give your cable swatch a neat and tidy edge.
Row 5 (RS): K4 (garter edge). P5. K8. P5. K4 (garter edge).
Row 6 (WS): K9. P8. K9.
Row 7: K4. P5. K8. P5. K4.
Rows 8-9: Rep row 6 and 7.
Row 10: K9. P8. K9.
Row 11 (Cable row): On the next row (front of work), begin the cable pattern. K4, P5, then follow the instructions below:
- Slip the next 4 stitches onto the cable needle and hold it to the front of your work.
- Knit the next 4 stitches directly from the left-hand needle (from the right-hand needle if you’re a leftie).
- Now, knit the 4 stitches from the cable needle.
Finally, P5, K4 to finish the row.
Row 12: K9. P8. K9.
Row 13: K4. P5. K8. P5. K4.
Rows 14-15: repeat rows 12 and 13.
Stitch Pattern Repeat: The swatch stitch pattern is made up of rows 6 through 15. Repeat them as many times as you need to practice this basic 8 stitch left leaning (left twist) cable, ending after finishing a 14th row.
Finishing rows: Once you’re satisfied with the cable pattern, knit 4 more rows in garter stitch pattern (knit all stitches in each row) to match the garter stitch border at the beginning.
Bind off: Bind off all stitches and cut the yarn, leaving a tail for weaving in later.
Troubleshooting: Little holes In Your Cable Knitting?
When you twist stitches and rearrange their order to create a cable, it’s common to see a small hole or gap forming. Don’t worry, this is completely normal, and it doesn’t mean you’re doing anything wrong. After working a few more rows or rounds, these gaps will blend in with the surrounding stitches, and you won’t even notice them anymore.
Additionally, you may observe that the stitches involved in the cable appear to stretch or loosen. Again, this is a typical characteristic of cable knitting and doesn’t indicate any mistakes. As long as you maintain a consistent and steady tension while knitting the cable, everything will turn out fine.
It’s important to acknowledge that cable knitting may feel unfamiliar or strange initially, which is why we highly recommend making some cabled swatches first before investing any real time into a project. This practice will help you become more comfortable with the technique and give you a chance to adjust your tension and become familiar with the unique characteristics of cables.
Remember, knitting is a journey of learning and improvement, and each project provides an opportunity to refine your skills. Embrace the process, have patience, and soon you’ll be creating beautiful cables with ease.
Blocking Your Cable Knit Projects
As you knit a few swatches of cable patterns, you’ll soon realize the value of giving your finished pieces a quick blocking. Blocking helps to refine the appearance of your cables, smoothing out any irregularities and enhancing the overall look of your knitting. It’s like giving your cables a final touch-up, ensuring that they stand out beautifully and showcase the intricate twists and turns. So, remember to block your cable knitting—it’s a simple step that can make a big difference in the final presentation of your project. Your cables will thank you for it!
If you’re new to the blocking process and need some guidance, we’ve got you covered! Our comprehensive guide will take you step by step through the quick and easy process of blocking your cable knitting. So, don’t worry if you’re unfamiliar with blocking—just follow our guide here and you’ll be a blocking pro in no time!
additional resources
Our Knitting Cables for Beginners Video
More of a visual kind of learner? We get it! Enhance your learning experience by checking out our tutorial video, where we provide a step-by-step breakdown that you can easily follow along with.
Video not displaying? Watch this tutorial on YouTube instead.
Left-Handed Tutorial on YouTube