A perfect first project when you want to start knitting clothing.
Skill Level | Easy
Available Sizes |XS, S, M, L, XL, 2XL
Project sponsored by Red Heart Yarns
introduction
About this Pattern
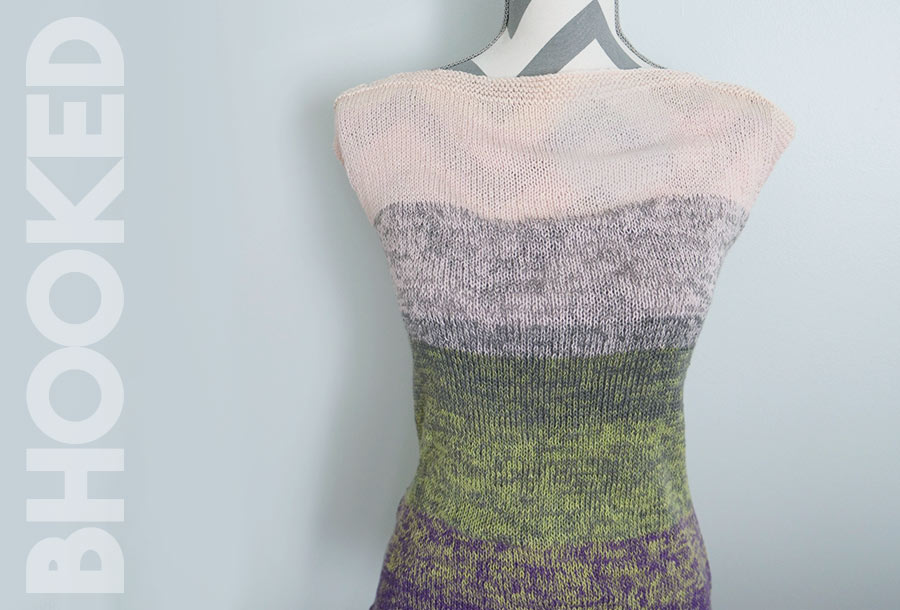
If you’re interested in trying your hand at knitting clothing, our simple summer knit top is the perfect place to start. It’s as simple as knitting two big rectangles and sewing them together.
With this project you’ll see how to construct a simple top with basic shapes and simple stitch patterns. It’s just the confidence you need to continue knitting more items of clothing in the future.
Before you begin, review this page entirely so you understand the full scope of the project. We’ve prepared a list of recommended supplies and abbreviations you’ll need to get started as well as a video tutorial to walk you through the process step-by-step.
getting started
Recommended Supplies
- 2(2, 2, 3, 3, 4) balls; It’s a Wrap Rainbow Yarn (Colorway picture: Whisper – images; Seaglass – tutorial)
- US 7 Circular Needle, 24″
- Yarn needle
- Scissors
FAQ: Can I use a different yarn?
Sure, as long as it’s in the same weight category. Check your gauge and adjust as needed so the sizing comes out right. The recommended yarn amount will likely be different too.
Yarn Substitution Resources:
The Ultimate Guide to Substitute Yarn
Not an Amazon Prime member? Get a free 30 day trial on us so you can unlock unlimited, free, two-day shipping on all sorts of stuff (yes, even yarn!) and instant access to thousands of movies, TV shows and books. Try Amazon Prime Free for 30 Days
Disclosure: As an Amazon Associate (and at no additional cost to you) I earn a small commission from qualifying purchases if you use the links below. Please understand I have experience with these products & recommend them because they are optimal for this pattern, not because of the commission I make as a result of you buying them. Using these links is not required but is a big support!
pattern details
Abbreviations
- CO Cast on
- K Knit
- P Purl
- PM Place Marker
- Rep Repeat
- Rem Remaining
- RS Right Side
- St(s) Stitch(es)
- WS Wrong Side

pattern notes
Additional Notes
Finished Size
- Finished Bust: 32.5(36.5, 40.5, 44.5, 48.5, 52.5)”
- Finished Length: 25(25, 26.5, 26.5, 27, 27)”
Gauge:
21 sts x 22 rows = 4″
(stockinette)
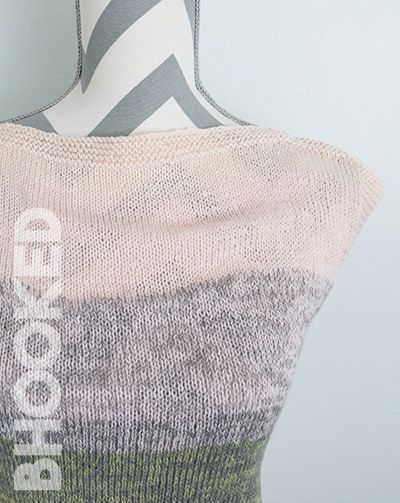
This breezy summer knit top is worked in two identical flat panels using only combinations of the knit and purl stitch. Use the measurements to block each panel before seaming them together for the best results.
The front and back panels are seamed together along the sides and shoulders to complete the top.
Additional Notes: Instructions for sizes are given as follows:
XS (S, M, L, XL, 2XL)
printable pattern
Need to print this pattern?
You’ll find the full pattern for free here on this page. However, if you’d like to have a PDF version to print or save for offline use, you can purchase it from our shop.
the pattern
Written Instructions
Front & Back Panel (Knit 2)
Row 1: CO 84(96, 108, 116,128, 136). K2, P2.
Row 2: K2, P2.
Repeat: Rep last row until panel measures 1.25(1.25, 1.5, 1.5, 2, 2)” from cast on edge.
Next row (RS): K all sts.
Next row (WS): P all sts.
Repeat: Rep last two rows until panel measures 16(16.5, 17, 16.5, 16.5, 16)” from cast on edge ending on a RS row.
Next row (WS): K 8(8, 9, 9, 10, 10). P to last 8(8, 9, 9, 10, 10). K last 8(8, 9, 9, 10, 10). PM in last st of this row.
Next row (RS): K all sts.
Repeat: Rep last two rows until you measure 6.5(7, 7.5, 8, 8.5, 9)” from marker. End on a RS row.
Next row (WS): K all sts.
Next row (RS): K all sts.
Repeat: Rep last row until panel measures 24.5(24.5, 26, 26, 26.5, 26.5)” from cast on edge. Bind off.
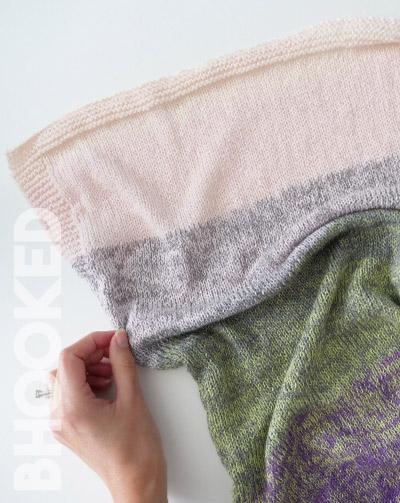
Finishing/Assembly
Block panel to the length: 25(25, 26.5, 26.5, 27, 27)” and width: 16.25(18.25, 20.25, 22.25, 24.25, 26.25)”.
Side seams: With RS facing up, seam along the two panels from cast on edge to marker. Rep for other side.
Shoulder seams: Lay top flat and measure 8(9, 10, 11, 12, 13)” from outer edge in towards middle. Place marker. Seam along edge catching both panels to marker.
By using this pattern, you agree to our terms of use:
This pattern is for personal use only. You agree not to modify, publish, transmit, sell, create derivative works or in any way exploit any of the content within this page, in whole or in part. If you wish to share this pattern, share a link to this webpage only. You may sell finished items made from this pattern.
Copyright, B.Hooked Crochet, LLC
see how it’s done
Step-by-Step Tutorial
Video not displaying? Watch this tutorial on YouTube instead.
Left-Handed Tutorial on YouTube