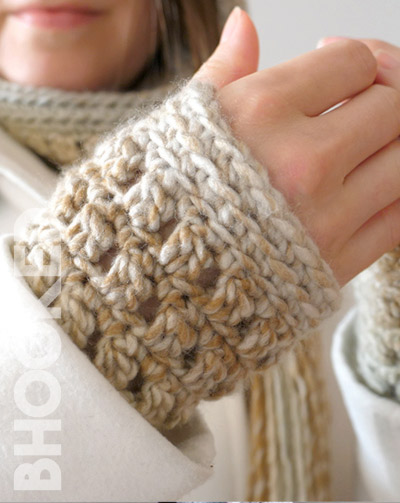
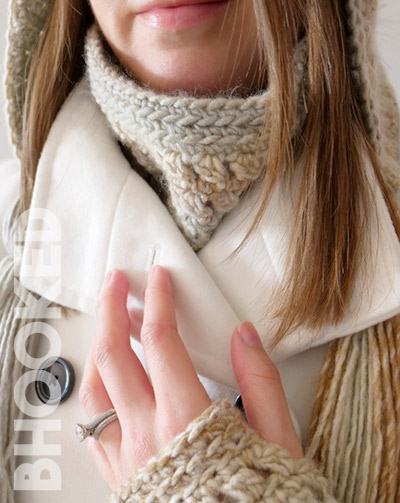
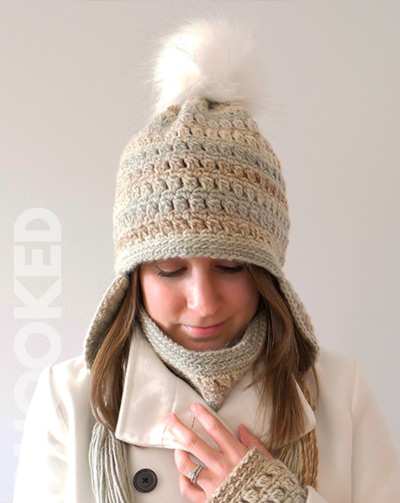
Pair this earflap crochet hat with our matching cowl and wrist warmers for a coordinated set.
Skill Level | Easy
Finished Size | 22-24″ circumference; 8.5″ hat length
Project sponsored by Red Heart Yarns
About this Pattern
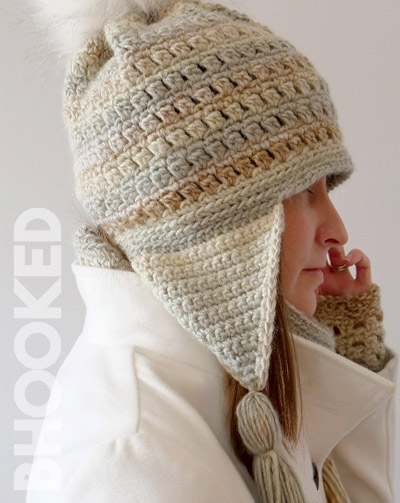
If you’re looking for a way to keep your ears even warmer this winter, an earflap crochet hat is the way to go. This hat pairs perfectly with our matching cowl and wrist warmers for a complete set.
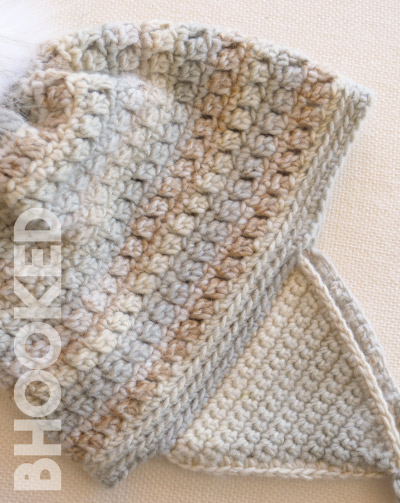
With this project, you’ll see how to add earflaps to a crochet hat that’s worked from the bottom up, a skill you can apply to any bottom-up crochet hat. The repeat is simple and easy to memorize so it’s great for when you want to tune out and just enjoy the process.
Before you begin, review this page entirely so you understand the full scope of the project. We’ve prepared a list of recommended supplies and abbreviations you’ll need to get started as well as a video tutorial demonstrating how to crochet this hat and, of course, written instructions to walk you through the entire process from start to finish.
Recommended Supplies
- Approx 210 yds; Red Heart Colorscape; (Colorway pictured: Munich)
- 6 mm Crochet Hook
- Yarn Needle
- Scissors
Abbreviations
This pattern is written using standard US crochet terminology.
- BLO Back Loop Only
- Ch Chain
- CL Cluster Stitch**
- Hdc Half Double Crochet
- Hk Hook
- Rep Repeat
- Rem Remaining
- Sc Single Crochet
- Sc2tog Single Crochet Two Together
- St(s) Stitches
**Clustered Stitch: YO, insert hk in designated st, YO and pull through 2 loops. YO, insert hk in same st, YO and pull through 4 loops. One CL st made.
Additional Notes
Finished Size
22″-24″ circumference;
8.5″ hat length
(without earflaps)
Gauge
6.5 sts x 10 rounds = 4″ worked in clustered stitch pattern.
(Rounds 4 and 5 make up clustered stitch pattern)
Additional Notes: Chain one at beginning of row does not count as a stitch.
Update: The yarn I used for the hat in the pictures is no longer available, but I’ll publish an update soon, including a different yarn recommendation. As soon as that update has been made, a PDF pattern will be available in my shop. Check back on this page for updates!
Written Instructions
Ear Flaps (Make Two)
Row 1: Ch 4. 1 sc in 2nd ch from hk and in each rem ch. Turn.
Row 2: Ch 1. 2 sc in first st. 1 sc in each st to last st. 2 sc in last st. Turn.
Row 3: Ch 1. 1 sc in each st. Turn.
Repeat: Rep rows 2 and 3 a total of 7 more times (19 sts on final row). Don’t fasten off.
Earflap Border: Continue working down the first side, evenly spacing 16 sc to first row. Then evenly space 3 sc in foundation ch for the bottom point. Evenly space 16 sc up the opposite side. Fasten off.
Hat
Round 1: Fasten on in the BLO of the first st of one ear flap. 1 sc in the BLO of each st. Ch 30. 1 sc in the BLO of each st of the other ear flap. Ch 12. Join with a slst to the BLO of the first sc. (80 sts)
Round 2: Ch 1. 1 sc in BLO of first st. 1 sc in the BLO of each rem st and each ch. Join with a slst to the BLO of the first sc.
Rounds 3-4: Ch 1. 1 sc in the BLO of first st. 1 sc in BLO of each rem st. Join with a slst to first sc.
Round 5: Ch 1. 1 hdc in same st as ch. *Ch 1, sk 1 st, CL in next. Rep from * to last 2 sts. CL in second to last st. Ch 1, sk last st. Join with a slst to first hdc.
Round 6: Ch 1. 1 sc in every CL st and every ch. Join with a slst to first sc.
Repeat: Rep rounds 5 and 6 until hat measures approximately 8.5″ from band edge ending on a 6th round. Fasten off leaving a long tail.
Finishing
Step 1: Weave the tail in and out of each stitch with a darning needle and pull tight to draw up. (be careful! If roving yarn unwinds, it will be very weak and may break. Make sure it is twisted tight before you pull)
Step 2: Use tail to secure drawstring closure by running the yarn through the stitches around the opening. Weave in the end once secure.
Step 3: Add a faux fur pompom.
Step 4: Make two tassels. Cut a piece of cardboard 4″ wide. Wind yarn around cardboard lengthwise 20 times. Break yarn, leaving a long end and thread through needle. Slip needle through all loops and tie tightly. Remove cardboard and wind yarn tightly around loops 3/4″ below fold. Fasten securely. Cut through opposite end of loops and trim evenly.
Step 5: Sew one tassel to the point of each earflap.
By using this pattern, you agree to our terms of use:
This pattern is for personal use only. You agree not to modify, publish, transmit, sell, create derivative works or in any way exploit any of the content within this page, in whole or in part. If you wish to share this pattern, share a link to this webpage only. You may sell finished items made from this pattern.
Copyright, B.Hooked Crochet, LLC
Step-by-Step Tutorial
Video not displaying? Watch this tutorial on YouTube instead.
Left-Handed Tutorial on YouTube
Right-Handed Tutorial on YouTube
SUBSCRIBE TO B.HOOKED ON YOUTUBE