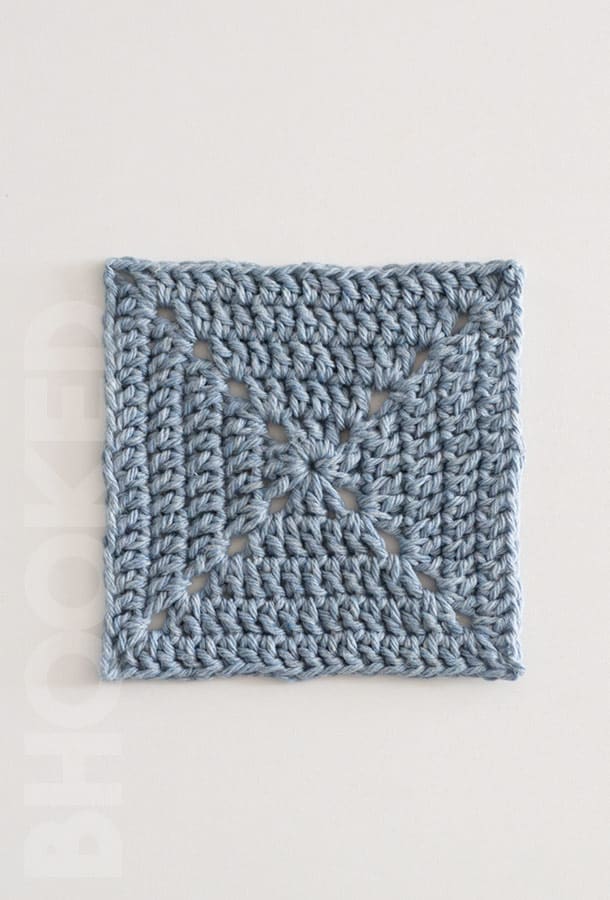
The corner to corner granny square, or sometimes called the C2C Granny Square, is a modern twist on the classic granny square. Rather than working in rounds, this granny square is crocheted in rows, starting at one corner and working to the opposite. This clever approach makes for an interesting granny square with so many creative joining possibilities.
In this article, I’ll show you the easiest way to crochet a corner to corner granny square. I’ve included lots of photos and a step-by-step tutorial to walk you through it all.
UPDATED: AUGUST 17, 2023 BY BRITTANY
This post may contain affiliate links.

In this tutorial, I’ll show you how to crochet a simple C2C granny square and give you tips for customizing the size of the finished square.
You really only need basic crochet skills for C2C granny squares. Knowing how to make the double crochet is a big plus, as well as crocheting in rows.
Here is a quick overview of the topics we will cover in this article:
- How to Crochet a corner to corner granny square
- Stitch Abbreviations
- Increasing the C2C Granny Square to the Size You Need
- Decreasing to Finish the Square
- Crocheting the Border Round
- Finishing Your C2C Granny Squares
- How to Join C2C Granny Squares
- What Yarn Works Best for C2C Granny Squares?
- C2C Granny Square Video Tutorial
- More Granny Square Tutorials + Free Patterns
How to Crochet a Corner to Corner Granny Square
To crochet a corner to corner granny square, you’ll start with one granny square cluster (three double crochets), increase until it’s as big as you want, then decrease back down to one granny square cluster. This is the basic structure, now let’s see how it’s done.
Supplies
- Yarn: For practice, use medium-weight yarn. You’ll only need a small amount for a small square.
- Crochet Hook: 4.5 mm crochet hook
Pattern Notes
- The corner to corner granny square is reversible, so it looks the same on both sides.
- This crochet pattern is written in US terms.
Three double crochets make up the traditional “granny clusters” in this pattern. You will sometimes see “clusters” in the pattern instructions, and this is what we’re referring to: the groups of three double crochets. Every cluster is worked between clusters of the previous row.
Additionally, you should know that the chain 4 at the beginning of every row counts as a double crochet and chain one.

Stitch Abbreviations
- Ch Chain
- Dc Double Crochet
- Hk Hook
- Prev Previous
- Rem Remaining
- Rep Repeat
- Sp Space
- St(s) Stitch(es)
- Tc Treble Crochet
C2C Granny Square Pattern Instructions
Row 1: Ch 3. Join with a slst to the first chain to form a ring. Ch 4 and make 3 Dc in the center of the ring. Ch 1 and make another dc in the center of the ring. Ch 4 and turn.
Row 2: 3 dc in the first ch 1-sp. In the last ch 4-sp, make (3 Dc, ch 1, Dc). Ch 4 and turn.
Row 3: 3 Dc in the first ch 1-sp. Make 3 dc in the space between the next two clusters of the prev row. In the last ch 4-space, make (3 Dc, ch 1, Dc). Ch 4 and turn.
Row 4: 3 Dc in the first ch 1-sp. *Make 3 dc in the space between the next two clusters of the prev row. Rep from * to last ch 4-sp. In the last ch 4-space, make (3 Dc, ch 1, Dc). Ch 4 and turn.

Increasing the C2C Granny Square to the Size You Need
Repeat: Rep row 4 until the side edge of the triangle is as wide as you want the square to be. Then proceed with decreasing instructions below to finish the square.

Decreasing to Finish the Square
If you haven’t already, chain 3 and turn.
Decreasing row: Sk the first ch 1-sp, and *make 3 dc in the space between the next two clusters of the prev row. Rep from * to the last ch 4-sp. In the last ch-3 sp, make 1 dc. Ch 3 and turn.

Repeat: Rep the last decreasing row until there are only two double crochet clusters left.

Last Row: In the space between the next two clusters from the prev row, make (1 dc, 1 tc, 1 dc). In the last ch-3 sp, make 1 dc.
The treble crochet in the last cluster helps to shape this corner into a point that matches the other three better. And that’s all there is to the square!
From here, it’s best if you add a border so the join will look neater.
C2C Granny Square Border Round
Without a border, the corner to corner granny squares are more difficult to join. it can be done, but it’s a lot easier and looks neater if you take this extra step.
Choose a contrast color if you want to frame your C2C granny squares, or choose the same yarn if you want it to blend in. I’ll use a contrasting color so you can see what I’m doing a little better.
Step 1:
Fasten on in the tc from the last row. (This will be the first point of the border round.) Ch 5, and make 2 more dc in the same st.
The placement for the remaining stitches will be the chain four spaces, and double crochets in the side of each row.


Step 2:
Working along the first side, make 2 dc around every double crochet and chain four spaces. (the number will differ from square to square depending on how big you make it).

Step 3:
In the next chain four corner space, make (2 dc, ch 2, 2dc). This is the corner pattern repeat for the next two corners as well.

Continue making 2 dc in each chain space and around each dc of this side of the square. When you reach the next corner (the starting ring), work the same corner pattern.
Following this same pattern, finish the last two sides of the square.
When you reach the starting corner, make one more dc in the same tc stitch. Then join with a slst to the ch 5. Fasten off and weave in your ends.
Finishing Your C2C Granny Squares
Unlike other granny squares, c2c granny squares look pretty square and nead right off the hook. If you want to take it a step further, you can wet blocking them before you start joining them together. This way it will look nice and tidy in the finished project.
Wet blocking will “set” the stitches into a perfectly square position so your finished project will look more polished and professional. If you’re unfamiliar with the blocking process, check out our beginner-friendly guide and video here.
How to Join C2C Granny Squares
joining your corner to corner granny squares can be just as creative and fun as crocheting them. You can change the entire look of a project simply by changing the way you join them.

Of the five most common ways to join granny squares, I really love the look of using the slip stitch joining method. This join is slightly raised, and brings visually interesting texture to the project.
But don’t feel limited by this one suggestion! Experiment with several joins to see which looks best for your project.
What Yarn Works Best for a C2C Granny Square?
The C2C granny square is a really versatile pattern as far as yarn goes. You can pair it with just about any yarn in your stash from lightweight to super bulky.
While solid-colored yarn is a classic choice, I find that C2C granny squares look beautiful with variegated yarn. Yarns with long sweeping color changes like Red Heart Super Saver Ombre (shown in the pictures), gives each square a two-tone look that can be rotated to create an interesting design when joined.

The texture of the yarn you choose will play into the overall design of the project once your squares are joined. Choose a smooth yarn for stitch definition that’ll show off the diagonal pattern or pair it with a slightly textured yarn for an even more interesting look.
C2C Granny Square Video Tutorial
In this video, you’ll get to see how the C2C granny square looks with a bulky weight yarn that’s solid in color. Please note that a couple minor improvements have been made to the pattern since this video was filmed, but it’s still a great resource if you’re hung up on the square pattern.
Video not displaying? Watch this tutorial on YouTube instead.
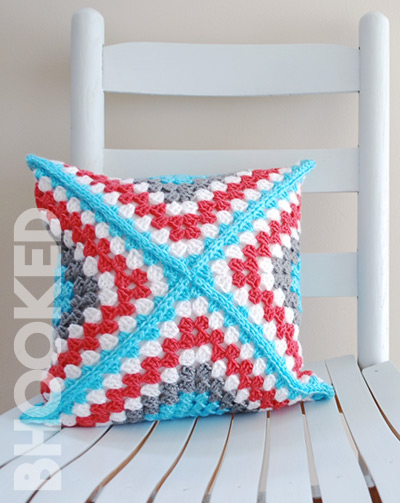
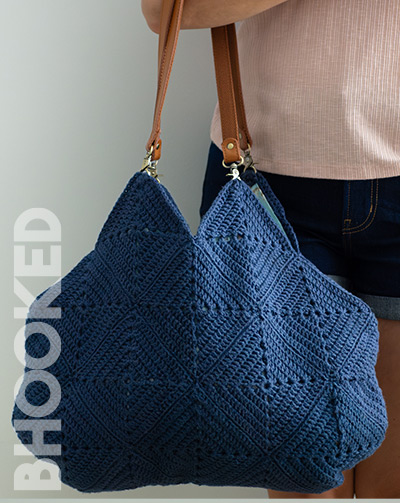
More Granny Square Tutorials + Free Patterns
Here are a few free patterns that we have available using the classic granny square and some familiar variants. We’re always adding to this list so bookmark this page and check back when you need some more granny square inspiration.


*Disclosure: Some of the links in this post are affiliate links, which means as an Amazon Associate, I earn from qualifying purchases made through these links. Please note that prices and availability of products are subject to change. This comes at no additional cost to you and helps support the content on this site. I only recommend products that I have personally used and genuinely believe in. Thank you for your support!