Ready to learn how to knit?
Knitting is an amazing hobby. It’s portable, affordable, doesn’t require a lot of tools, and it produces beautiful creations that are also functional. But aside from all that I believe that knitting can do more for you than just make pretty things!
In this step-by-step guide, we’ll cover everything you need to learn how to knit (for beginners) from the basics like holding the hook and yarn, basic stitches, and some tips for finding your first projects.
It’s my goal for this to be your one and only resource for learning how to knit.
UPDATED: DECEMBER 20, 2023 BY BRITTANY
This post may contain affiliate links.
There’s a lot of information on this page, but take it one section at a time to learn how to knit. I’ll be sure to include all the resources you need to be successful!
Here’s a quick overview of the topics we’ll cover in this article:
- What You Need to Get Started
- What Yarn Should You Use?
- What Needles Should You Use?
- Yarn Needle and Scissors
- Should You Pick a Pattern First?
- Step 1: Make a Slip Knot
- Step 2: Holding the Yarn and Needles
- Step 3: Casting On
- Step 4: Learn the Knit Stitch
- Step 5: Knitting Bind Off
- Step 6: Learn the Purl Stitch
- Step 7: Learn the Stockinette Stitch
- Step 8: Learn to “Read Your Knitting”
- Step 9: Adding More Yarn
- Step 10: Picking Your First Project
- Where to Find More Knitting Patterns
What You Need to Get Started
The greatest thing about knitting is you need very few supplies to make something incredible. With some yarn, a pair of needles, a yarn needle, and a trusty pair of scissors, you can make just about anything you want.
What Yarn Should You Use?
When it comes to knitting for the first time, not all yarn is created equal. The texture and smoothness of a yarn will determine how easy it is to work with. As a beginner, you have enough to worry about – use a smooth, medium weight yarn and make it much easier on yourself!
I recommend looking at…
- Lion Brand Heartland
- Red Heart Soft
- Caron Simply Soft
- Loops & Threads Impeccable
- I Love This Yarn
These yarns have a few things in common: they’re all twisted together from multiple strands (aka plied yarns), feel smooth, and fall into the worsted weight category.
While you don’t have to use the exact yarns in this list, it’s smart to think about how thick and smooth your yarn is when you choose one to learn how to crochet.
Now, if you’re eyeing those fuzzy-looking yarns, it’s better to resist the temptation…for now. Fuzzy yarns can make it hard to see your stitches as you crochet (that’s called ‘low stitch definition’). This can be tricky, especially if you’re just starting out.
It’s a good idea to get comfortable with the techniques we’ll cover in this guide before diving into those super soft and fuzzy yarns.
So how much do you need? Start with one skein at first. That’ll be plenty to experiment with and make the swatches I’ll teach you in this guide.
What Needles Should You Use?
Knitting needles come in two main varieties – straight needles and circular (corded needles).
Straight needles are typically made in 12 or 14″ length and circular needles typically come in 16″, 24″, 32″ and 40″.
Circular needles are most known for knitting projects in the round (like hats) but you can knit any project on a pair of circular needles. With straight needles, however, you can only “flat knit” or work a project back and forth in rows (like a scarf). That’s why a pair of circular needles is our “perfect pair”.
With knitting, the size of your project will determine the length of the needle you need. If you want to knit a scarf that’s 8″ wide a 12″ or longer straight pair of needles will work as well as a pair of 24″ or longer circulars. Why won’t 16″ circulars work? When you flat knit on circulars, you have to have enough length for the entire project as well as a little slack to work with.
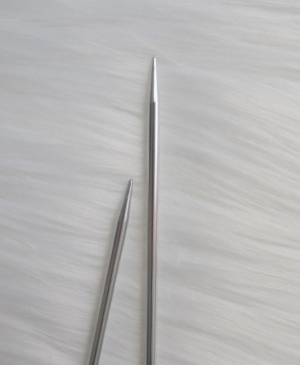
Different materials to consider…
- Metal (smooth & allows the yarn to glide easily over it)
- Plastic (smooth but the yarn glides more slowly over it)
- Wood (also smooth and the yarn glides more slowly over it)
Picking the right needles is important because it can make a big difference in how much you enjoy knitting. If you’ve got a set that’s uncomfortable, snags on the yarn, or just feels like it’s working against you, it can turn a fun activity into a frustrating one real quick.
So, here’s what I suggest: Get yourself a pair of metal needles, a pair of plastic needles, and a pair of wooden needles. Then, give each of them a try with the tutorials below. By comparing them side by side, you’ll figure out pretty fast which one you enjoy working with the most.
Straight or Circular? Straight needles are perfectly fine for the tutorials in this guide. They’re affordable and available in individual sizes (not requiring you to invest in an expensive set with all the sizes). However, eventually, you’ll be limited in the projects you want to make. Once you figure out what material you prefer knitting with, you’ll want to invest in a circular needle set so you can make projects of all sizes.
Which size do you need? The best way to figure out what crochet hook sizes to go with is to look at the yarn label. Towards the back of the label, you’ll see something like this…
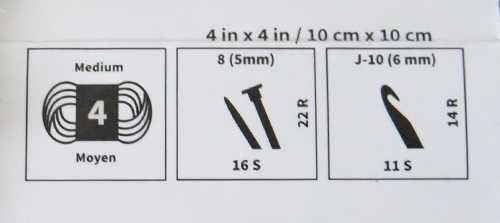
For this yarn, a size 8 knitting needle (or 5 mm) is a great place to start. So when you’re at the store getting your supplies to learn how to knit, look at the yarn label and buy the needle size recommended there.
It’s not the only needle size that can be used with the yarn (and in future projects, you should always follow the needle size in the pattern) but since you’re just picking a yarn to learn how to knit, this is the best way to figure out what needle size to buy so you can follow along with the rest of this guide.
Yarn Needle and Scissors
After you finish a knitting project, you’ll have some loose ends to deal with. These ends include where you started, where you finished, and any extras if you added new yarn or changed colors along the way.
To make them neat, you’ll need two trusty tools: a yarn needle for weaving and, of course, a good pair of scissors. These are must-haves to give your project that polished look.
Now, when it comes to choosing a yarn needle:
- Go for one with a big enough eye so you can easily thread the yarn through.
- Stay away from plastic needles; they can be a bit snaggy.
- Consider getting a set with different sizes.
Chibi bent tip needles by Clover are my absolute favorite, and you can order them on Amazon pretty cheap!
That’s it! All you really need are four things: some yarn, a pair of needles, a yarn needle, and your trusty scissors. You might see lots of cool gadgets and accessories when you shop for knitting stuff, and it’s fun to explore them.
Now, one more important thing we need to touch on before we get started, and it’s not a wildly popular idea.
Should You Pick a Pattern First?
Maybe you found an amazing knitting project on Pinterest and you can’t wait to make it. But here’s the deal: it’s not the best idea to learn how to crochet with a pattern right away.
When you’re just starting out, everything about knitting will feel new and maybe a bit awkward. Your first tries might not look perfect – that’s totally okay!
So I encourage you to follow through with all 10 steps of this guide before you start on your first actual project.
I want you to keep that excitement for your dream project while being realistic. Know that your early attempts won’t be flawless. Even if you do everything right, it takes practice to get perfect stitches. Your skills will get better with time, and your stitches will look smoother.
That’s why I’m a big advocate for learning how to crochet with small stitch swatches. These little practice pieces help you get the hang of it and build confidence. Then once you feel more at ease, you can try making your first real project. I’ve got some ideas for those at the end of this guide!
How to Knit Step 1: Make a Slip Knot
The slip knot is what you create to get the yarn attached to the crochet needles. There are a few different ways to make this knot but the result is the same – a knot with a sliding loop to put the needle through to get your project started.
Here’s how to do it:
How to Knit Step 2: Holding the Yarn & Needles
Getting the hang of holding the needles and yarn is probably what you’ll struggle with the most. It’ll feel completely awkward, and you’ll feel completely uncoordinated…for a while. But the good news is that it’ll eventually just click. You just have to stick with it long enough for that to happen.
Some people feel more comfortable holding the yarn in their dominant hand, while others prefer to hold it in their non-dominant hand. These two preferences form the basis of two main knitting styles: continental knitting and American knitting.
While there’s no right or wrong way, one of these styles will feel more natural for you. The only way to find that out is to try them both.
Remember that it’ll all feel awkward for a little while, but you’ll feel more comfortable with one of these styles. So go ahead and give both a try and see which one clicks with you.
It’s all about finding that sweet spot where you feel most comfortable and in control.
How to Knit Step 3: Casting On
The cast on is the foundation for every single knitting project and there are many different varieties. In this example, I’ll show you the most basic and most widely used cast on – the long tail cast on.

With the slip knot on your needle and the yarn in your hands, work the long tail cast on until it all feels comfortable (or until you run out of room on your needle). Don’t worry about how many stitches there gets to be, just keep going until it starts to feel natural (you can rip it out later and reuse the yarn).
Here’s a quick video to show you how it’s done:
Practice:
Keep making cast on stitches until it feels natural for you. Don’t worry about how many you’re making. Just keep going until you can’t fit anymore on your needles. You can unravel it and re-use the yarn in later steps.
The most important takeaway from this step of the knitting process is to make sure that your cast on stitches are even in size and shape, and that you feel like you’ve found a “groove”.
When you accomplish this, the next step will be to make your first swatch of stitches.
Nearly all knitting stitches are made from a combination of these two basic stitches
- Knit
- Purl
How to Knit Step 4: Learn the Knit Stitch
The knit stitch is the first stitch you should learn after mastering the long tail cast on, and the best way to do that is to make a little swatch.
If you haven’t already unraveled your cast on stitches, do that, leaving 15 stitches (or loops on the needle).
Each loop is a place to make a stitch. Since there are two knitting styles, American and continental, I made a quick video for how to make the knit stitch so you can try them both.
Knit Stitch Continental Style
Knit Stitch American Style
Since you started with 15 cast on stitches, you should make 15 knit stitches in your swatch. When you reach the end of your row, the next step is to turn the work and start building the next row.
Knit Stitch Practice
Keep adding knit stitches to your swatch until it feels natural and your stitches start to look uniform. Again, don’t worry about how long your swatch gets. You can unravel and re-use the yarn later.
When you finish the last row you want to practice, jump to the bind off step and tutorial.
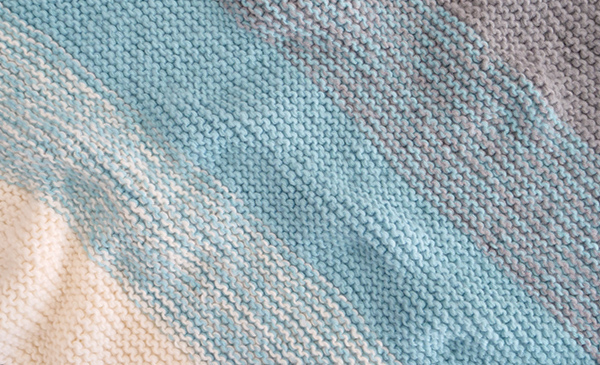
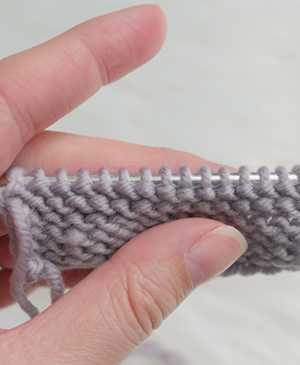
By itself, a knit stitch worked every stitch of every row in the project will create the garter stitch pattern – a textured and stretchy fabric that’s great for all sorts of projects.
How to Knit Step 5: Knitting Bind Off
When you finish your swatch (or any project for that matter), there are two things you’ll need to do to wrap it up – bind off (to get the loops secured and off the needles), and weave in the ends so it looks complete.
Here’s how to bind off to finish your first practice swatch:
Weaving in the ends is the next thing you’ll need to do. It’s an important step you won’t want to skip. It’s how you hide the tails from the beginning and end of the project as well as any additional ends from adding new yarn to the project. Here’s how it’s done:
How to Knit Step 6: Learn the Purl Stitch
The purl stitch is the next stitch to learn after mastering the knit stitch, so that’s the next swatch we’ll make.
Start with another slip knot and make 15 long tail cast on stitches. Then watch these video to see how to knit the purl stitch in both the continental and American knitting styles.
Purl Stitch Continental Style
Purl Stitch American Style
Since you started with 15 cast on stitches, you should make 15 purl stitches in your swatch. When you reach the end of the row, the next step is to turn the work and start building the next row.
Purl Stitch Practice
Keep adding purl stitches to your swatch until it feels natural and your stitches start to look uniform. Again, don’t worry about how long your swatch gets. You can unravel and re-use the yarn later.
When you finish the last row you want to practice, jump back to the bind off step and tutorial.
You’ll notice that by purling every stitch of every row, it’ll look exactly like your first swatch – garter stitch. This is because knits and purls are “opposites” of one another. In other words, your all knits and all purl swatches will look the same.
But when you alternate a knit row with a purl row, you create the classic “stockinette” stitch pattern.

How to Knit Step 7: Learn the Stockinette Stitch
You’ll discover as you keep knitting that the majority of stitch patterns are some combination of knits and purls. The most basic and recognized stitch pattern that uses both knits and purls is the stockinette stitch. So that’s the next swatch you’ll make.
Start by casting on 15 stitches again. Then knit every stitch of the first row. Turn the work, and purl every stitch of the next row.
As you alternate a knit row, and purl row, you’ll see the beautiful stockinette pattern take shape.
Keep adding knit stitches to your swatch until it feels natural and your stitches start to look uniform. Again, don’t worry about how long your swatch gets. You can unravel and re-use the yarn later.
When you finish the last row you want to practice, jump to the bind off step and tutorial.
How to Knit Step 8: Learn to “Read Your Knitting”
As you worked on your stockinette stitch swatch, did you notice that your knit stitches and purl stitches looked a little different? “Reading your knitting” is a fancy way of saying you can identify the stitches on your needles. This is important if you ever have to set your project down, and return. You’ll know where you left off by “reading your knitting” and finding your place again in the pattern.
A Knit

A Purl
How to Knit Step 9: Adding More Yarn
You probably won’t run out of yarn when working through this guide and making your swatches but knowing how to add a new ball of yarn is another must-know skill. Since you’re just starting out, let’s keep this as simple as possible and add the new yarn at the end of a row.
You can cut your yarn at the end of the row in your swatch to give this a try or simply watch the tutorial and take a mental note for when you need to add more yarn to your project in the future. This tutorial will show you how to add new yarn for all of the four basic stitches:
How to Knit Step 10: Picking Your First Project!
By now, you’ve hopefully followed along with all the tutorials in this guide and taken the time to create a couple of swatches for each of the basic stitches. Now for the fun part!
Making beginner-friendly knitting patterns with step-by-step tutorials is kind of my thing. I have several projects for you to choose from. So think about the type of project you want to make and click the image to be taken to the pattern and step-by-step tutorial:

Where to Find More Knitting Patterns
Ravelry | This is the biggest pattern database you’ll find on the web. You’ll be able to filter through patterns of all shapes, sizes, and skill levels.
Yarn Manufacturers | Yarn companies like Red Heart, Yarnspirations, and Lion Brand have hundreds of free patterns to download on their websites. You can usually find a pattern printed on the inside of the yarn label too.
B.Hooked Knitting Patterns | You’ll find hundreds of free patterns here on this website. Just click on that link to be directed to our crochet patterns page.
Magazines | Whether you’re a digital or page-turner type, you’ll find a handful of crochet magazines that offer patterns as well as tips within their pages.
Books | You’ll find themed crochet pattern books all over Amazon and probably a few in your local book store too.
Pinterest | You’ll find thousands of pins for crochet patterns on Pinterest that are both free and paid for.
The most important thing to remember when choosing your first knitting project is to select one in the beginner category and it’ll be even more helpful if there’s a video tutorial for it too. That’s why the best place to find your first project is online rather than in a magazine or book. You won’t likely find a step-by-step tutorial to help you through the process of reading the pattern.
The other important thing to consider when choosing your first project is how long it will take to make. A blanket sounds like a really practical project but it can take dozens of hours to complete. If your first project is something that takes hours and hours to make, it’ll feel like you’re getting nowhere and you probably won’t have the motivation to finish it.
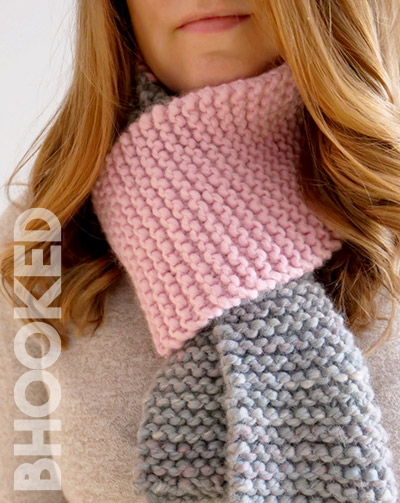
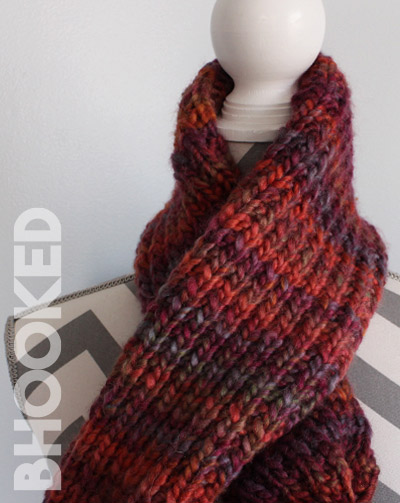
That’s why I recommend a “quick win” project – something you can knit in a few hours or finish on a weekend. Something like a headband, mug cozy, boot cuffs, a small cowl, or a scarf with bulky yarn is the best place to start for your first project. Here are a few from our pattern database that’ll be great for your first crochet project.